If you haven’t connected a wallet or funded a Trading Account yet, start with Getting Started first.
Signing back in
If your session has expired, reconnecting will prompt the Terms of Use modal again. Confirm both checkboxes and click Agree and Sign to resume trading.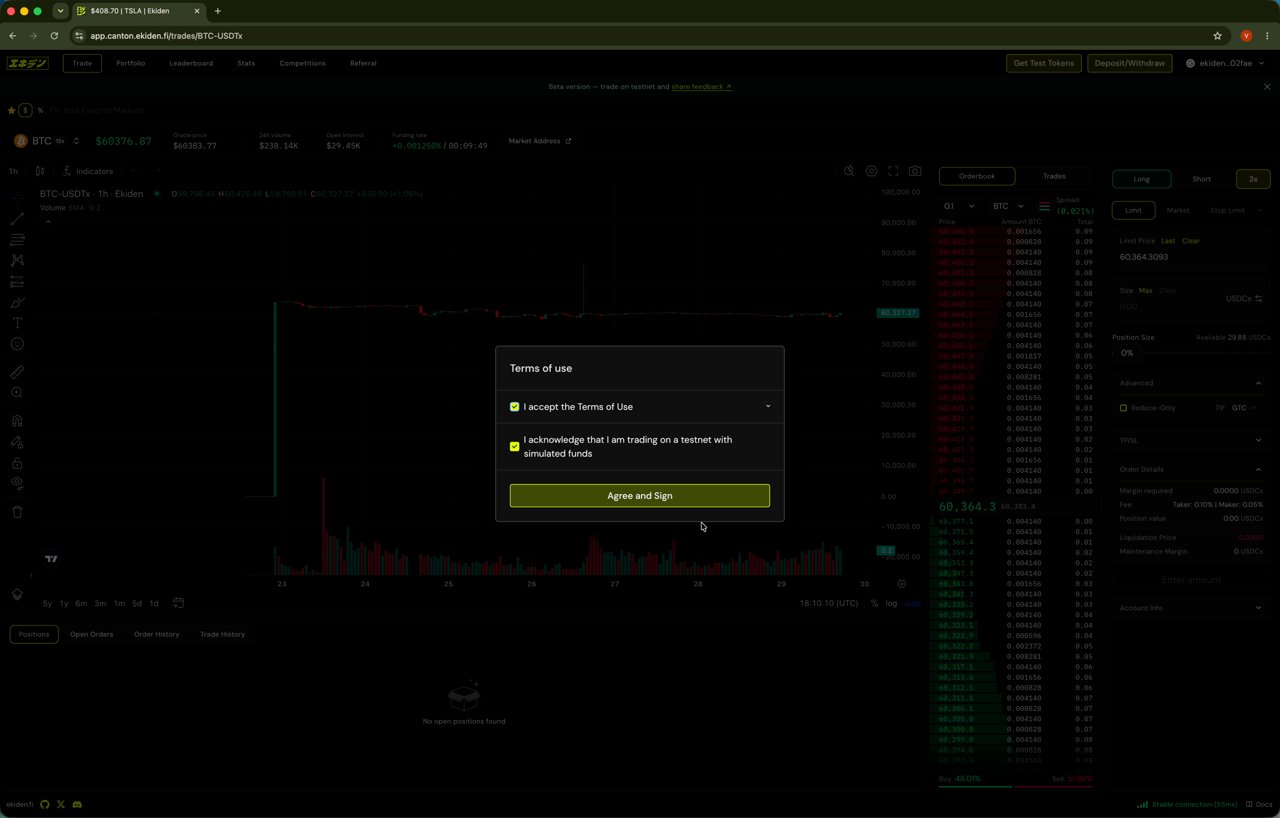
Funding your account
Use Get Test Tokens to top up your Funding Account, then deposit into your Trading Account. A confirmation toast appears once the vault balance updates.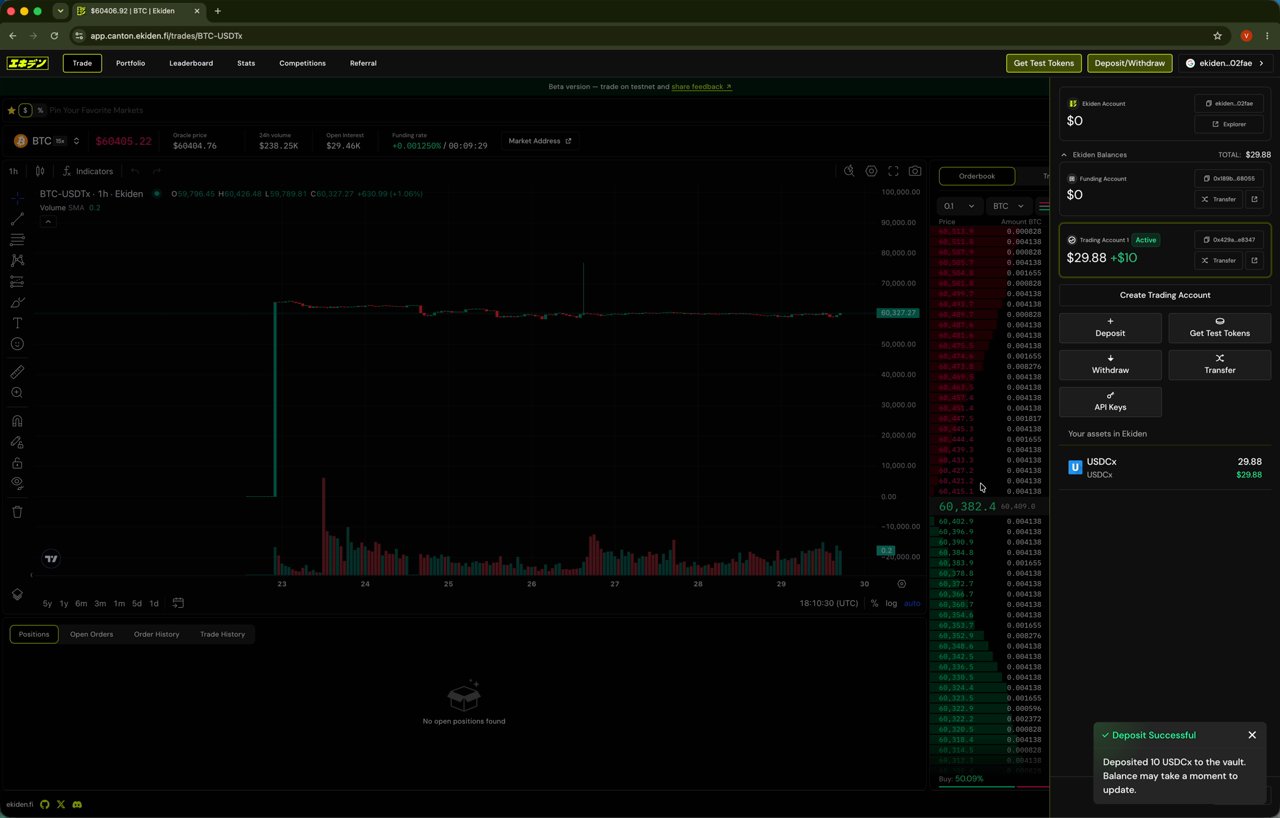
Order types and Time in Force, explained
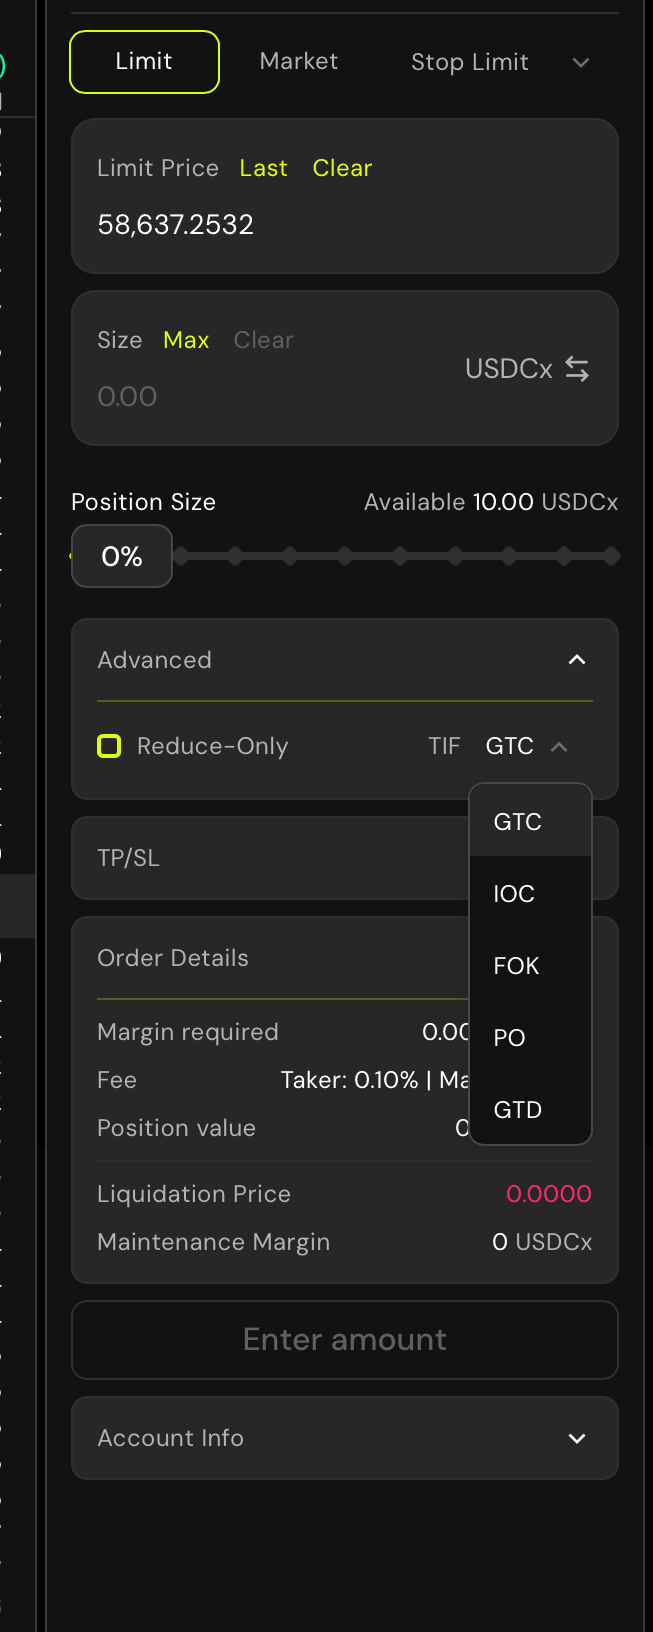
Ekiden’s order panel has three order type tabs — Limit, Market, and Stop Limit — plus an Advanced section with Reduce-Only and a Time in Force (TIF) dropdown. That Advanced section is where any additional order types would live if the panel had them; it doesn’t — it only exposes Reduce-Only and TIF. So functionally, these three order types (each combinable with the five TIF modifiers below and Reduce-Only) are the complete current set.
Limit — why use it
Limit — why use it
You set the exact price you’re willing to trade at. The order sits on the book and only fills at your price or better. Use it when you want price certainty and are fine waiting (or not filling at all if the market never reaches your price).
Market — why use it
Market — why use it
You skip price selection entirely and fill immediately against the best available price(s) in the book. Use it when speed/certainty of execution matters more than price precision — at the cost of potential slippage on thin order books.
Stop Limit — why use it
Stop Limit — why use it
A Limit order that only becomes active once the market trades through a trigger price you set. Commonly used to enter on a breakout, or to defend a position (a defensive stop) without watching the screen — but unlike a plain stop-market, once triggered it still behaves like a Limit order, so in a fast-moving market it can be triggered and still not fill if price runs past your limit.
Reduce-Only — why use it
Reduce-Only — why use it
Restricts the order to only reduce or close your existing position on that market — it can never open a new position or flip you to the opposite side, even if the size you enter would otherwise overshoot. Use it for exits and stop-losses where you want a hard guarantee you can’t accidentally add exposure.
Time in Force: GTC / IOC / FOK / PO / GTD — what each means
Time in Force: GTC / IOC / FOK / PO / GTD — what each means
These control how long an order is allowed to rest and how it can be filled, independent of order type:
- GTC (Good Till Cancelled) — stays open until it fills or you cancel it manually. The default for most traders.
- IOC (Immediate Or Cancel) — fills whatever portion it can immediately, cancels the rest. Avoids leaving a resting order on the book.
- FOK (Fill Or Kill) — must fill the entire size immediately or the whole order is cancelled. No partial fills.
- PO (Post Only) — guarantees your order only adds liquidity (maker), never removes it (taker); it’s rejected instead of matching immediately. Used to guarantee maker fees instead of taker fees.
- GTD (Good Till Date) — like GTC, but auto-cancels at a specific date/time you set.
Opening a position
Choose your order type and leverage
In the order panel, select Limit, Market, or Stop Limit, then set your leverage multiplier (e.g. 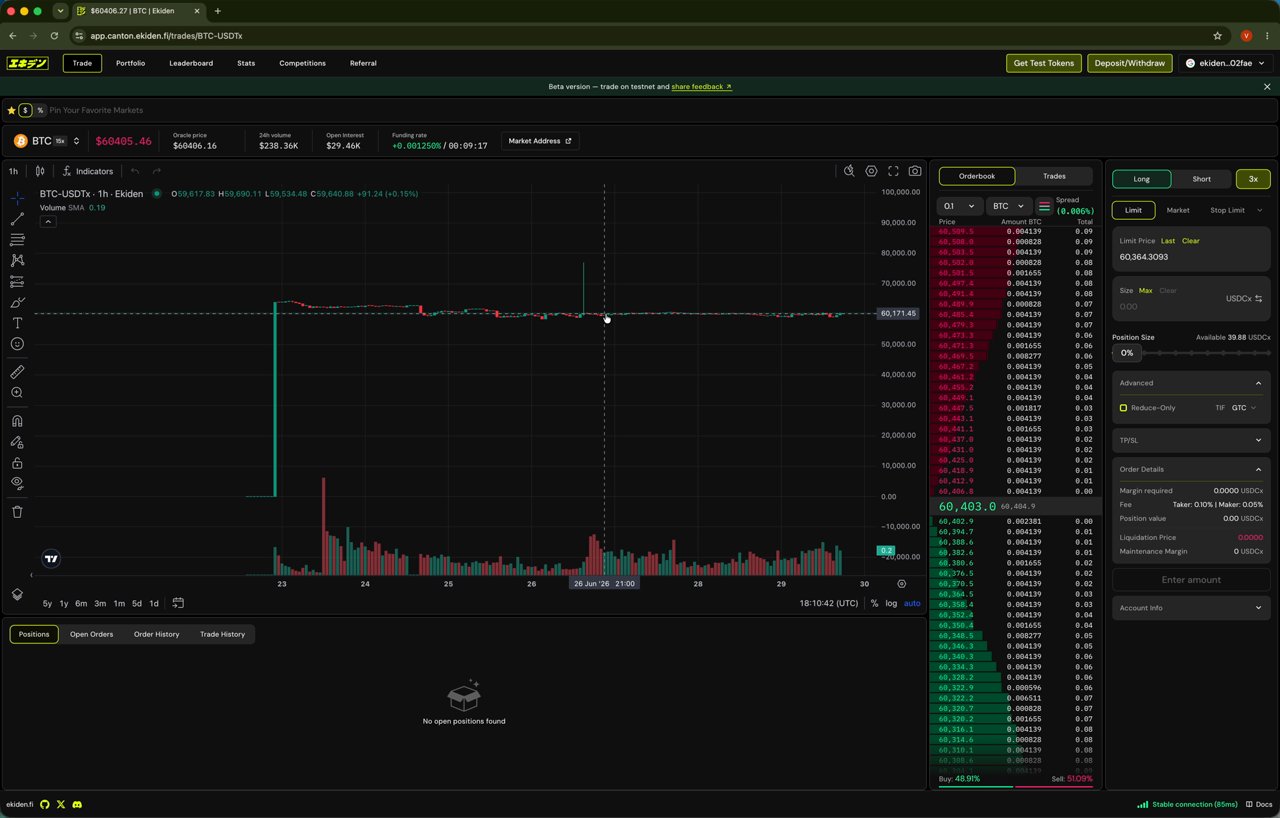
3x). The available margin updates to reflect your buying power at that leverage.Adjust leverage in detail (optional)
Clicking the leverage value (e.g. 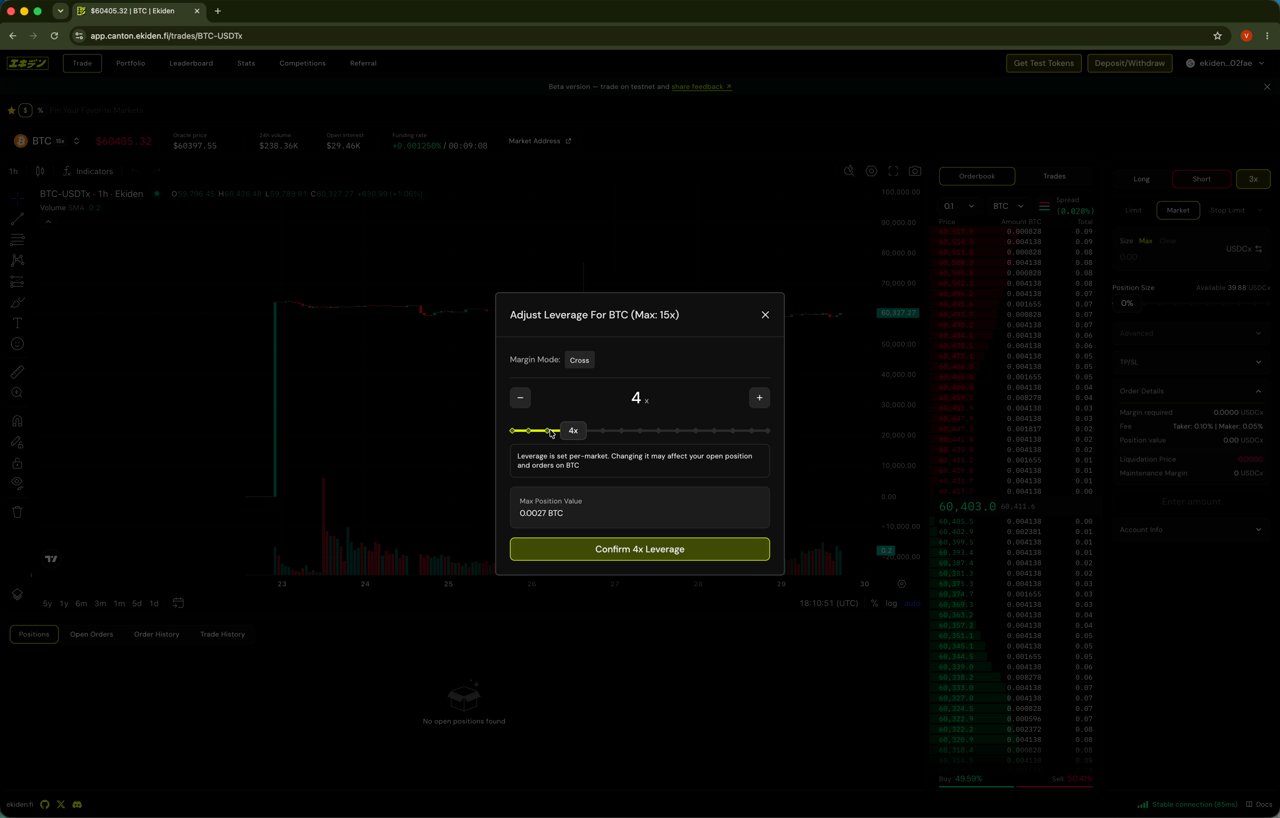
3x) opens an Adjust Leverage modal with more control than the quick selector:- Margin Mode: Cross — in cross mode, all positions on your Trading Account share the same margin pool, so a loss on one position can be offset by available margin from the rest of the account. (Ekiden’s UI currently shows Cross; an Isolated mode — where each position only risks the margin assigned to it specifically — is the typical alternative on perpetuals platforms, but wasn’t observed in this flow.)
- Leverage slider / stepper — drag or use +/− to pick a multiplier, up to the market’s max (shown in the modal title, e.g. “Max: 15x”). Max leverage is set per market, not account-wide — a volatile asset will usually cap out lower than BTC.
- Max Position Value — recalculates live as you change leverage, showing the largest position your current margin could open at that multiplier.
Pick Long or Short and size your order
Toggle Long or Short, enter a size (or drag the percentage slider to use a portion of your available margin), and submit. Market orders fill immediately at the current price.
Confirm the position in your Positions table
Filled orders appear instantly in the Positions panel at the bottom of the screen, showing size, entry price, mark price, liquidation price, unrealized PnL, and funding. Each row has a Close button.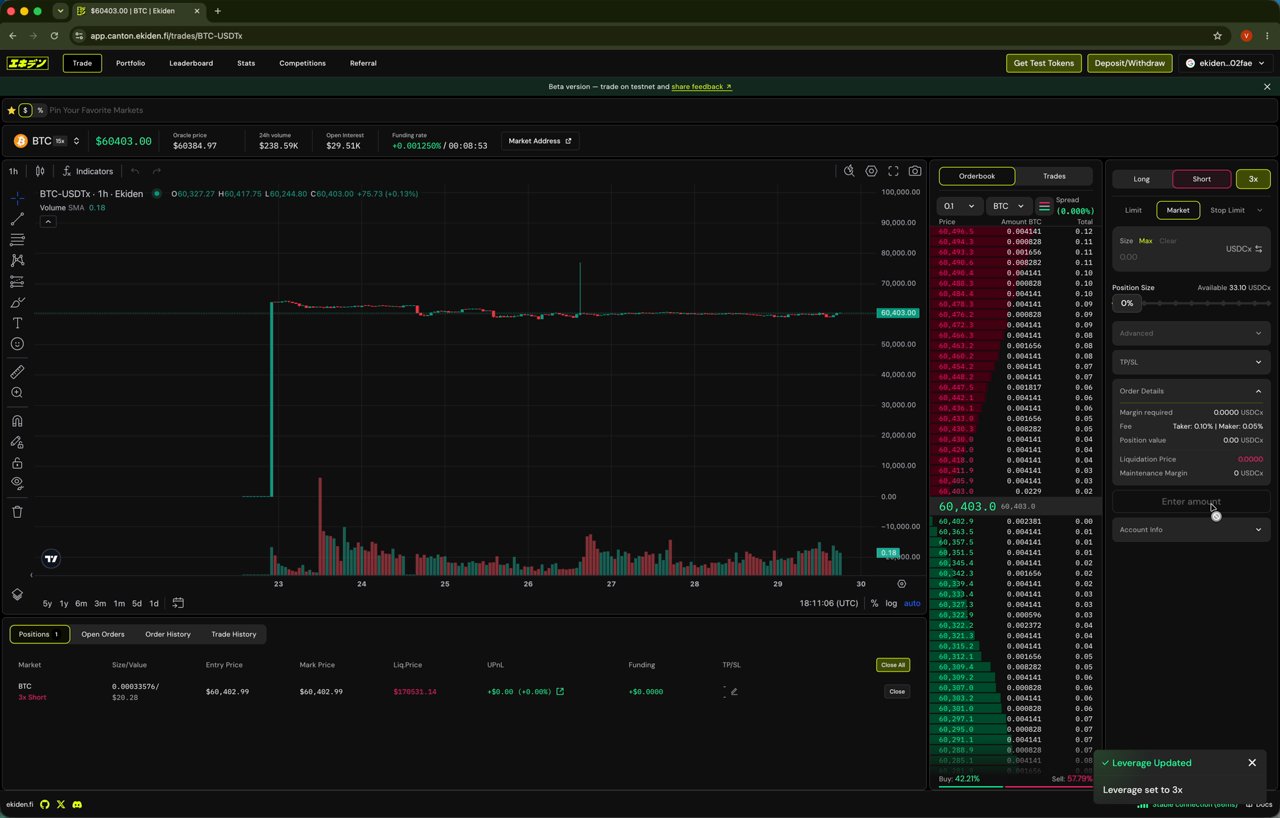
Switch markets to diversify
Use the market dropdown (top-left of the chart) to search and switch between trading pairs. Each row shows last price, 24h change, funding rate, 24h volume, and open interest.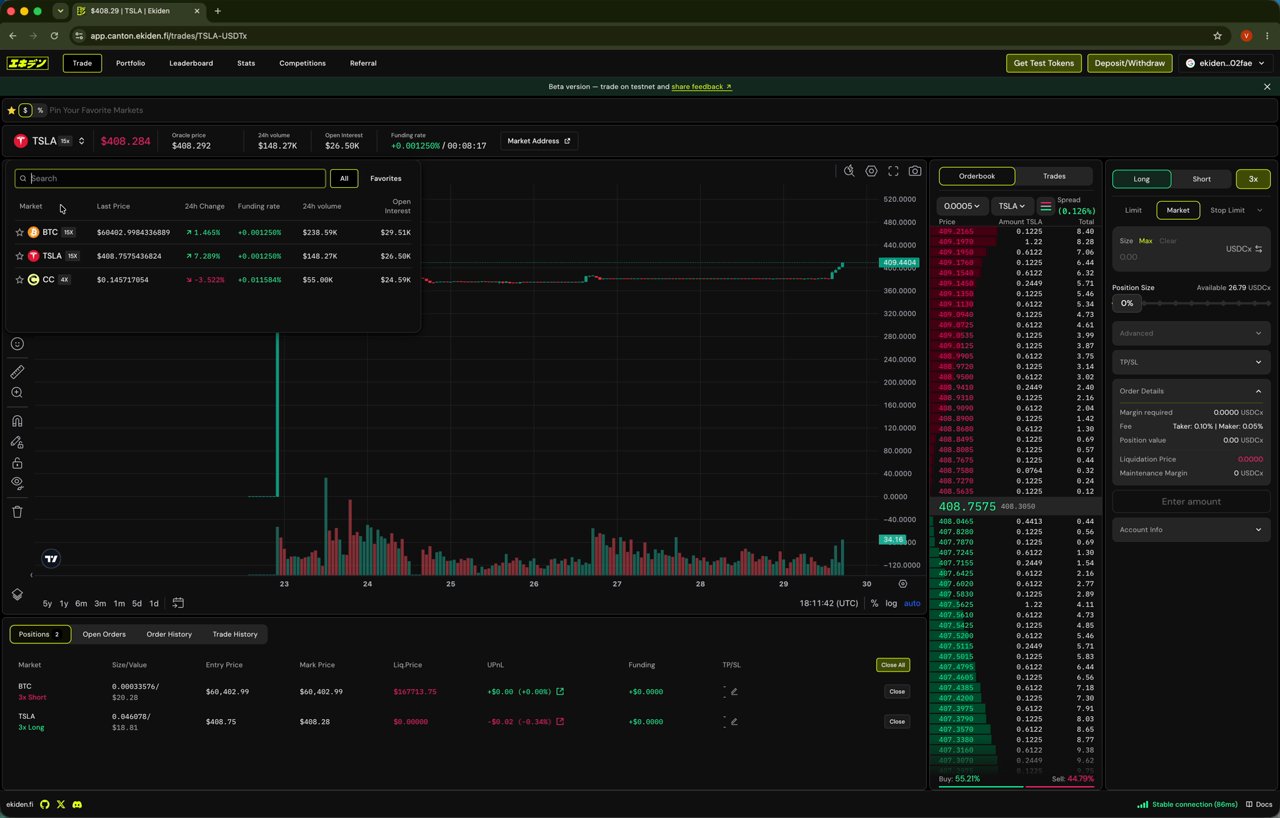
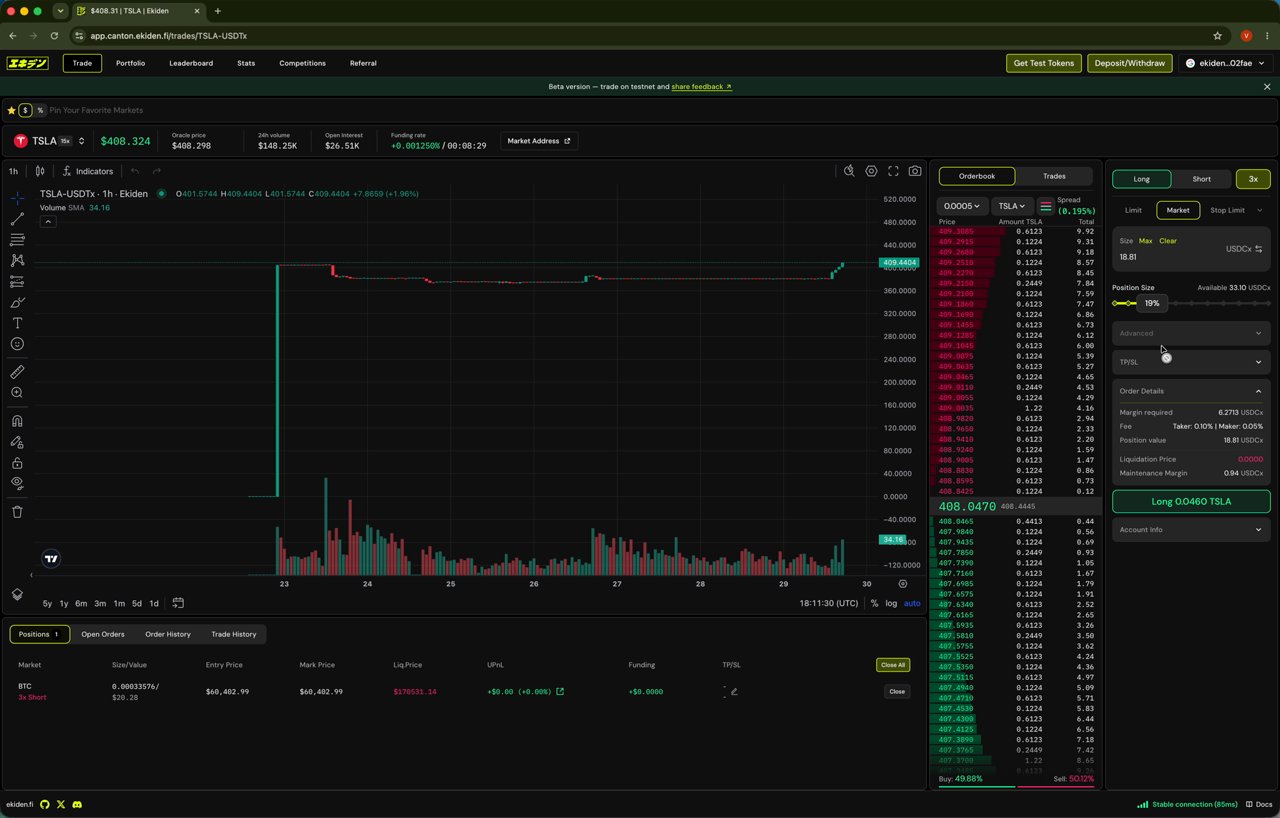
TSLA-USDTx alongside your BTC short.Setting Take Profit / Stop Loss
Open TP/SL on a position to define exit conditions without watching the market manually.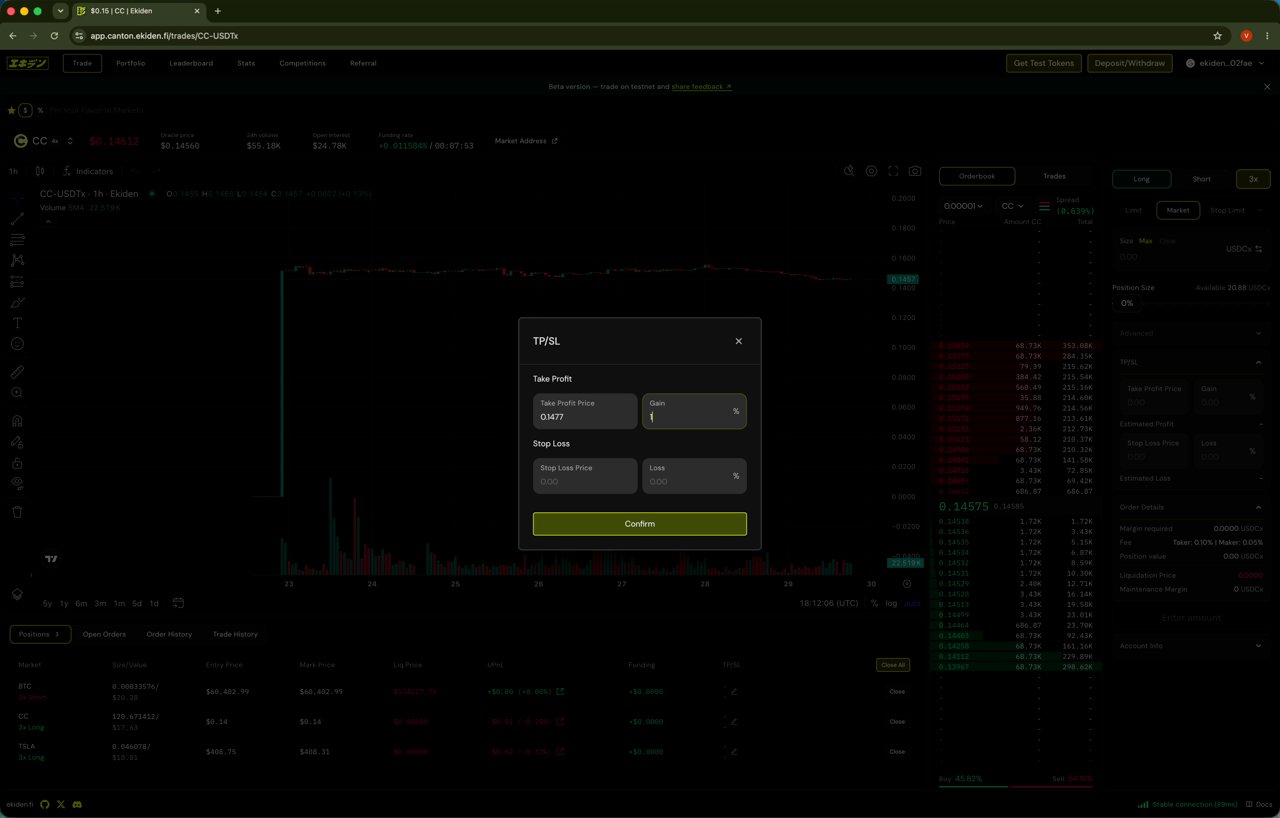
Set a Take Profit
Enter a Take Profit Price or a target Gain % — the other field calculates automatically.
Tracking your account: Portfolio
The Portfolio tab is your account command center.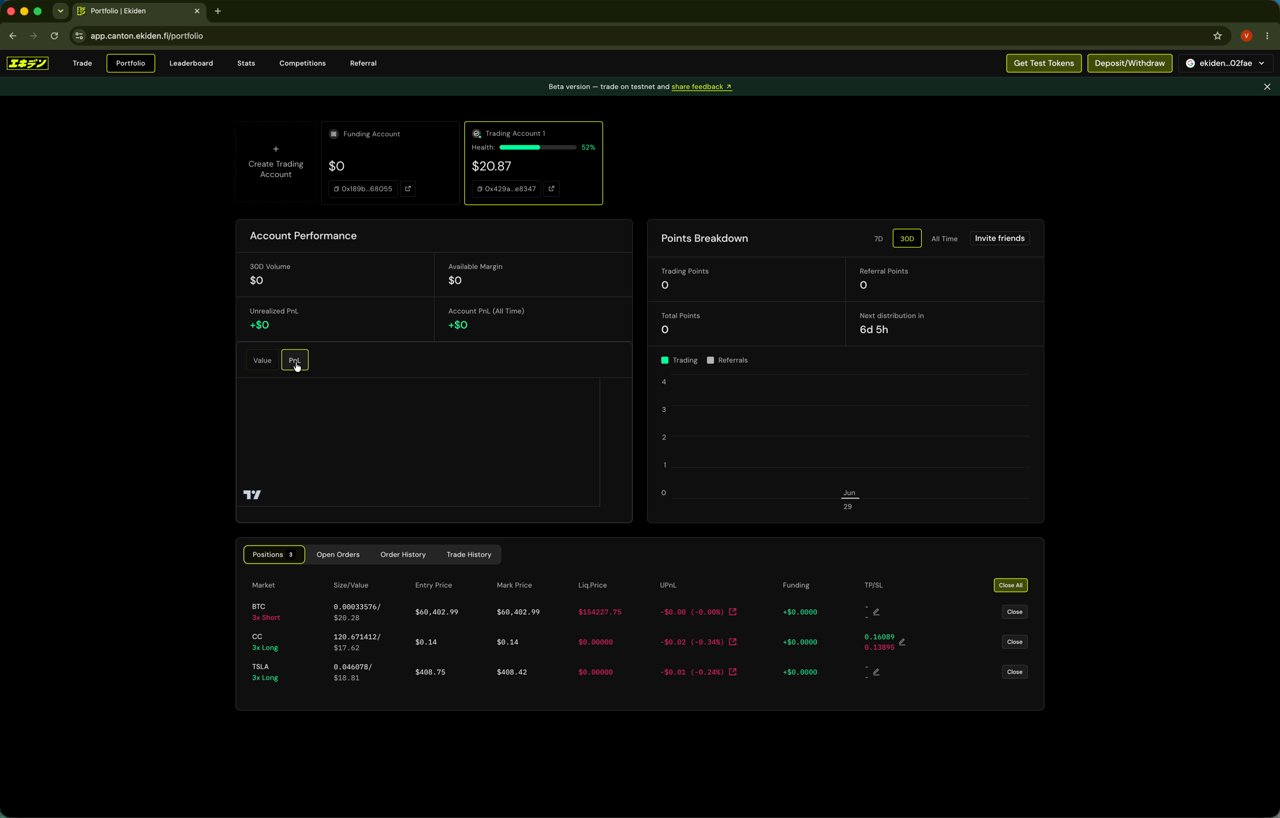
- Funding Account and Trading Account balances, plus a Health indicator
- Account Performance: 30-day volume, available margin, unrealized PnL, and all-time account PnL
- Points Breakdown: trading points and referral points, viewable by 7D / 30D / All Time, with a countdown to the next points distribution
- A unified Positions table, plus tabs for Open Orders, Order History, and Trade History
Reviewing trade history
The Trade History tab lists every fill — timestamp, market, side (Buy/Sell), price, size/value, and fee.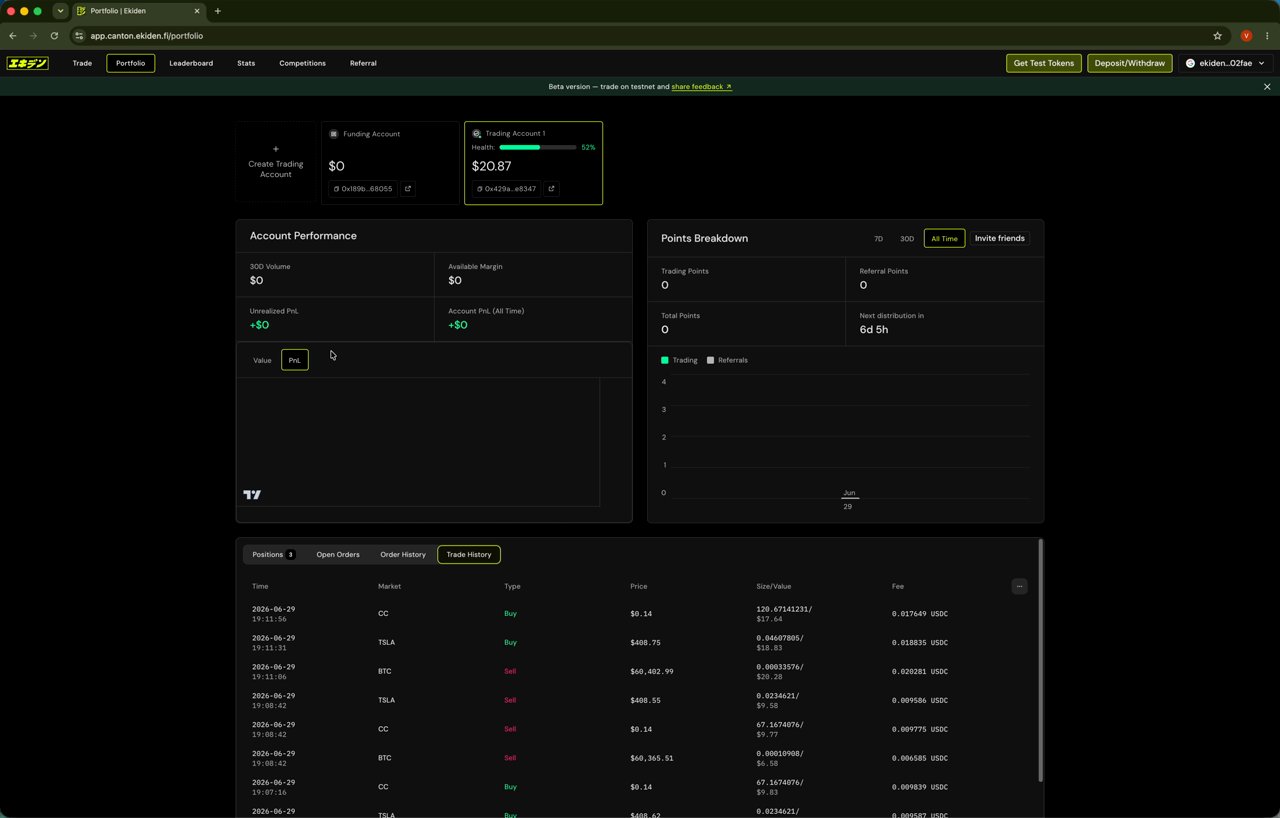
Platform-wide stats
The Stats tab shows exchange-level metrics: 24h trading volume, active traders, total trades, and open interest, along with a per-market breakdown (price, 24h change, average funding, volume, and open interest).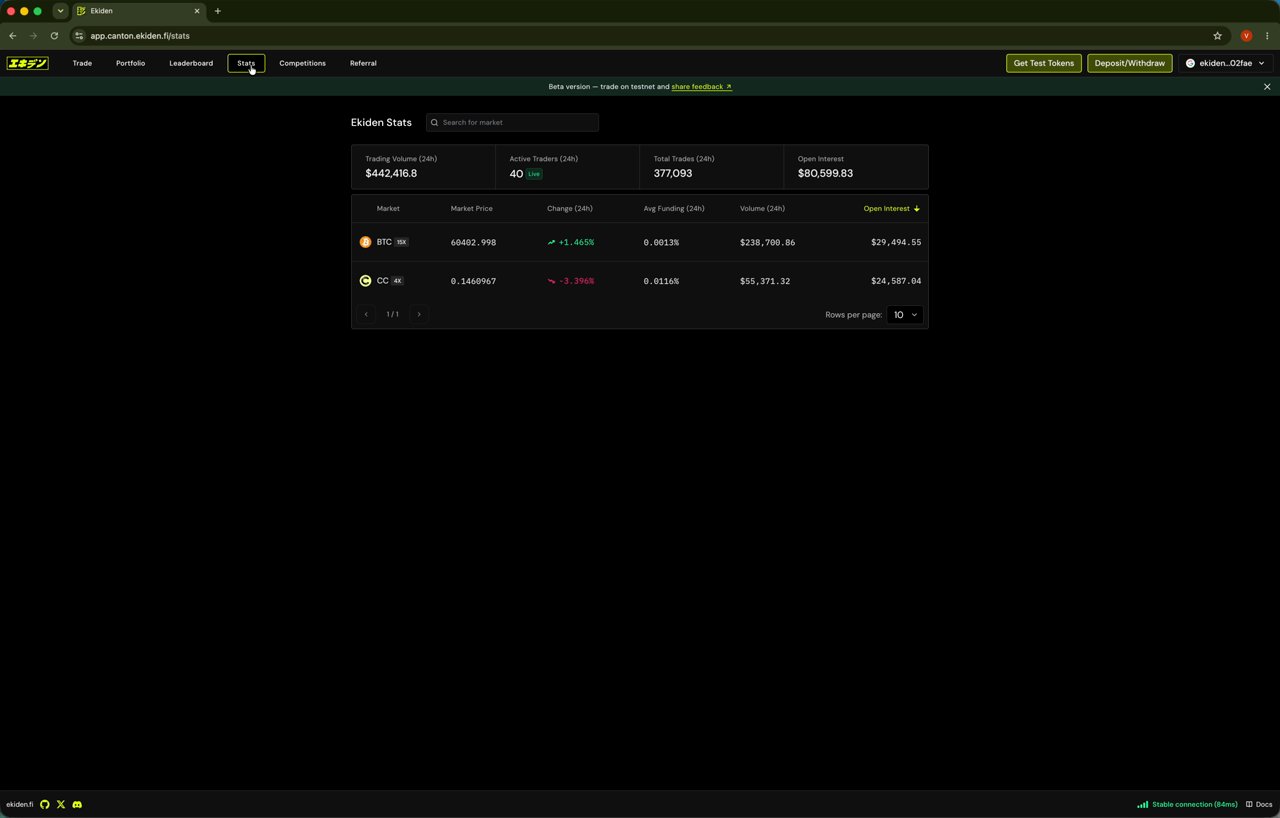
Referring other traders
The Referral tab gives you a unique referral code and link to share, plus a live count of invited users. You can copy the link directly or share it to X in one click.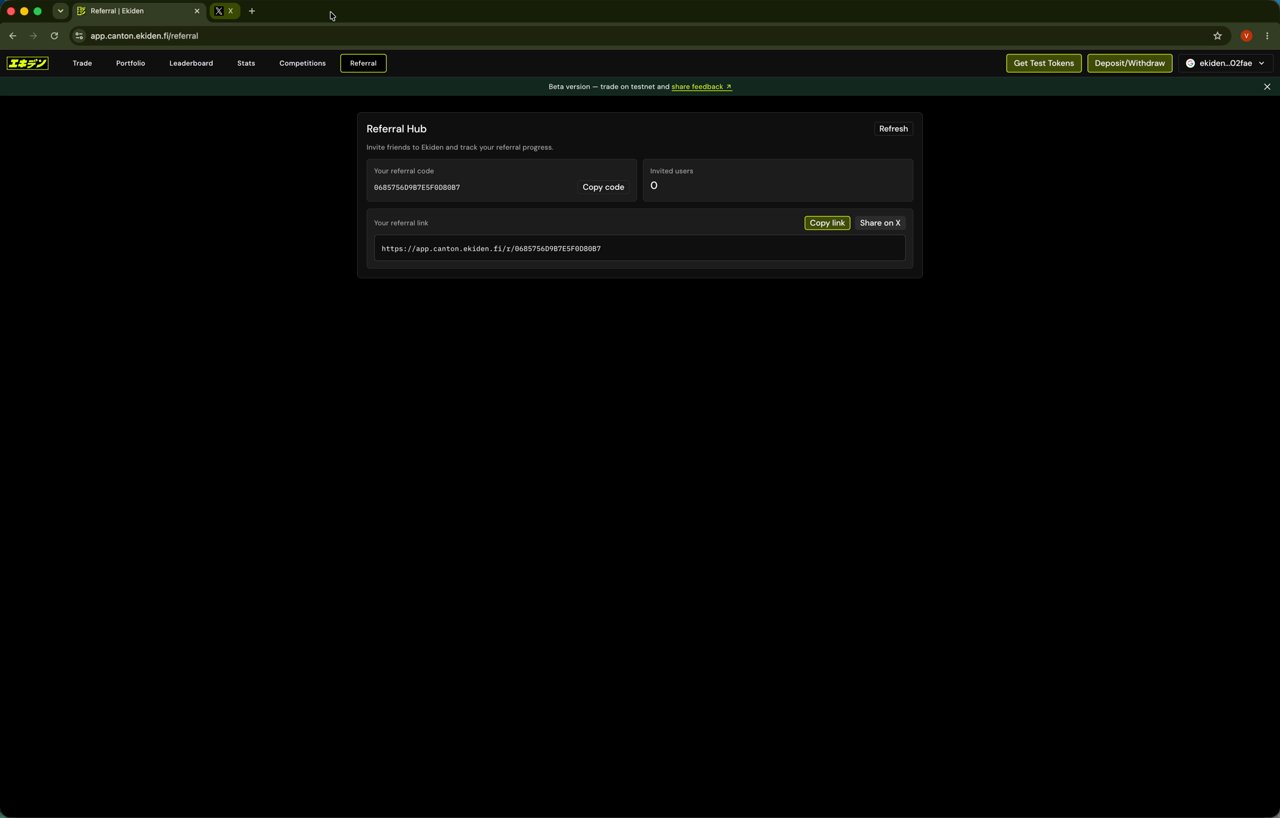
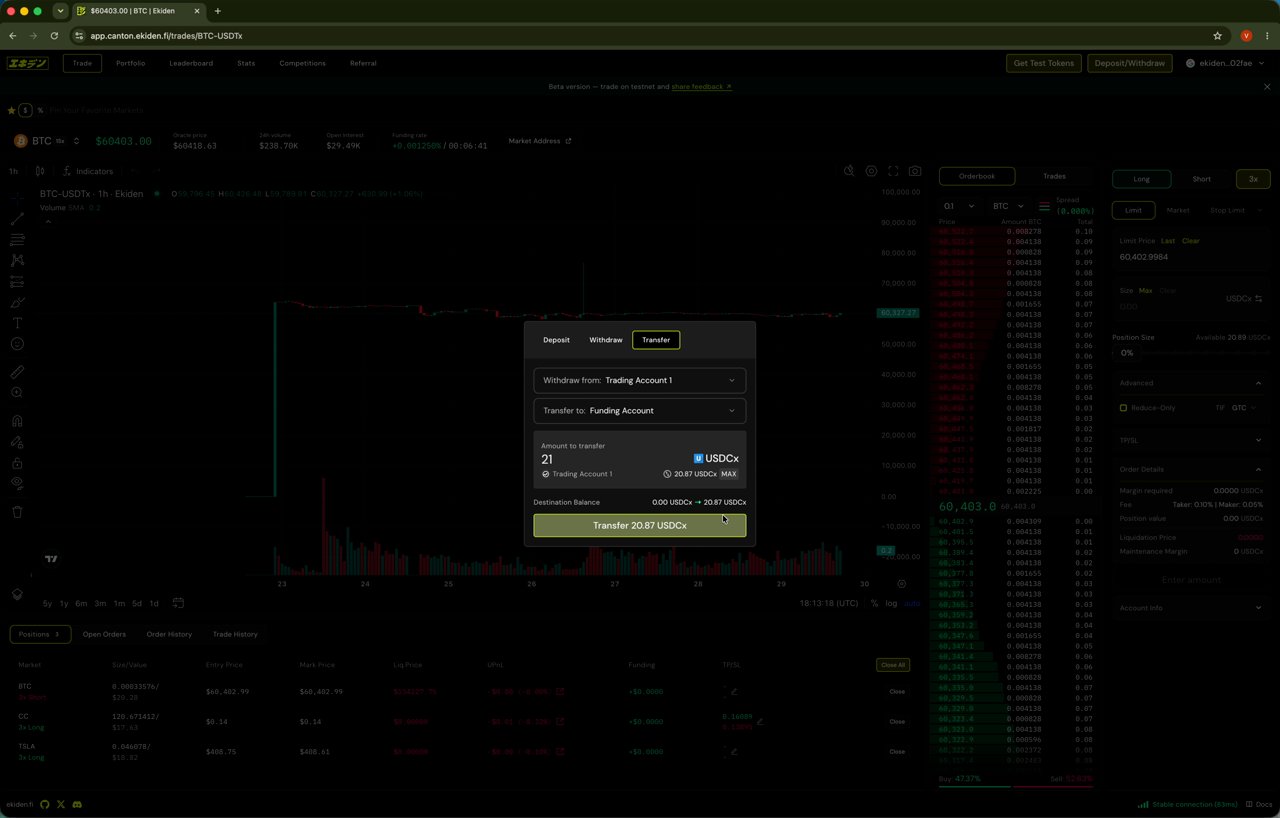
Moving funds between accounts
Use Deposit/Withdraw → Transfer to move USDCx between your Funding Account and Trading Account without leaving the app — for example, pulling margin back out of a Trading Account after closing positions.