Ekiden is currently in beta and runs on testnet with simulated funds. No real assets are at risk while you follow this guide.
Key concepts before you start
Canton Network works differently from most chains users are familiar with (Ethereum, Solana, etc.). A few concepts explain almost every “why” question that comes up during onboarding.Why does Ekiden talk about a 'Party ID' instead of just a wallet address?
Why does Ekiden talk about a 'Party ID' instead of just a wallet address?
On most blockchains, a wallet is just a key pair, and the public key (or a hash of it) is your address. Canton doesn’t have a single global ledger that everyone reads from — instead, every account is represented by a Party ID, a cryptographic identity that lives on a specific validator (participant) node.A Party ID looks like
hint::fingerprint. On Ekiden specifically, that hint is Ekiden — your Party ID starts with Ekiden:: followed by a long cryptographic fingerprint, because Ekiden operates its own validator (participant) node on Canton Network. When you sign up, Ekiden’s validator is the one that hosts your party and processes your transactions — that’s also why you don’t need to bring your own separate Canton wallet to get started (see the sign-up flow below).Practical effect for you as a user: your Party ID isn’t just an address that might have funds — it’s tied to a specific validator that actually hosts your data and processes your transactions. Because that validator is Ekiden itself, onboarding is closer to signing into an app than deploying a wallet from scratch.Why is privacy different on Canton vs. Ethereum-style chains?
Why is privacy different on Canton vs. Ethereum-style chains?
On a typical public chain, every transaction is visible to everyone. Canton was built for regulated finance, so it does the opposite by default: a transaction’s data is only shared with the parties actually involved in it (plus anyone they explicitly designate as an observer). The network’s coordination layer (the “synchronizer”) only ever sees encrypted blobs, timestamps, and ordering — never your actual trade data.This is why Ekiden, despite being a public trading venue, doesn’t expose a fully public on-chain order book the way an Ethereum DEX might — privacy is enforced at the protocol level, not bolted on.
What does 'Enable Preapprove' actually do, and why is it a separate step?
What does 'Enable Preapprove' actually do, and why is it a separate step?
On Canton, receiving certain assets (like USDCx) isn’t automatic the way receiving ETH or SOL is. A token can require a transfer pre-approval before it can be deposited directly into your account without you having to manually accept an incoming transfer offer each time.Practically: Enable Preapprove registers your Party ID as willing to receive USDCx directly. If you skip it, deposits would instead arrive as “transfer offers” that you’d have to manually accept one by one — and unaccepted offers can expire (typically within 24 hours) and bounce back to the sender. Pre-approving once removes that friction for every future deposit.
Custodial or self-custodial — who actually holds the keys?
Custodial or self-custodial — who actually holds the keys?
Ekiden is itself a validator on Canton Network (see above), which is why sign-up doesn’t require installing a separate browser wallet extension. Instead, you sign up or log in with Google or email/password, and Ekiden provisions your Party ID (
Ekiden::...) for you behind that login — the wallet is created and hosted as part of your Ekiden account rather than something you bring from elsewhere.In practice this means: your Ekiden login is your wallet access. There’s no separate seed phrase to back up for the wallet itself — account recovery works the same way your Google or email login recovery would. This is a different trust model from a self-custodial browser wallet (like Loop) where you alone hold a seed phrase, or an MPC/institutional custody wallet (like Dfns) with policy-based key controls — Ekiden’s model trades some of that self-custody for a much simpler sign-up flow.Your Trading Account balance inside Ekiden (what you see after depositing) is a further, separate layer on top of this: it’s the portion of funds you’ve explicitly moved from your wallet into Ekiden’s trading vault, not your whole wallet balance.Why Testnet, and why do balances reset / get labeled 'simulated'?
Why Testnet, and why do balances reset / get labeled 'simulated'?
Canton Network operators run three parallel environments — DevNet, TestNet, and MainNet — so that applications and wallet integrations can be tested against real network upgrades before anything touches real value. Ekiden’s beta runs entirely on TestNet:
- All USDCx you claim via Get Test Tokens is testnet-only and has no real-world value.
- Network upgrades on testnet can, in principle, reset state — that’s expected and is exactly what testnet is for.
- This is also why the onboarding checklist explicitly makes you tick “I acknowledge that I am trading on a testnet with simulated funds” before you can sign in — it’s a compliance-style confirmation, not just a formality.
Overview
Connect & Onboard
Link your wallet and complete the 6-step setup checklist.
Fund Your Account
Claim test tokens and deposit USDCx into your Trading Account.
Step-by-step setup
Open the Trade screen and click Connect
Navigate to a market (e.g. 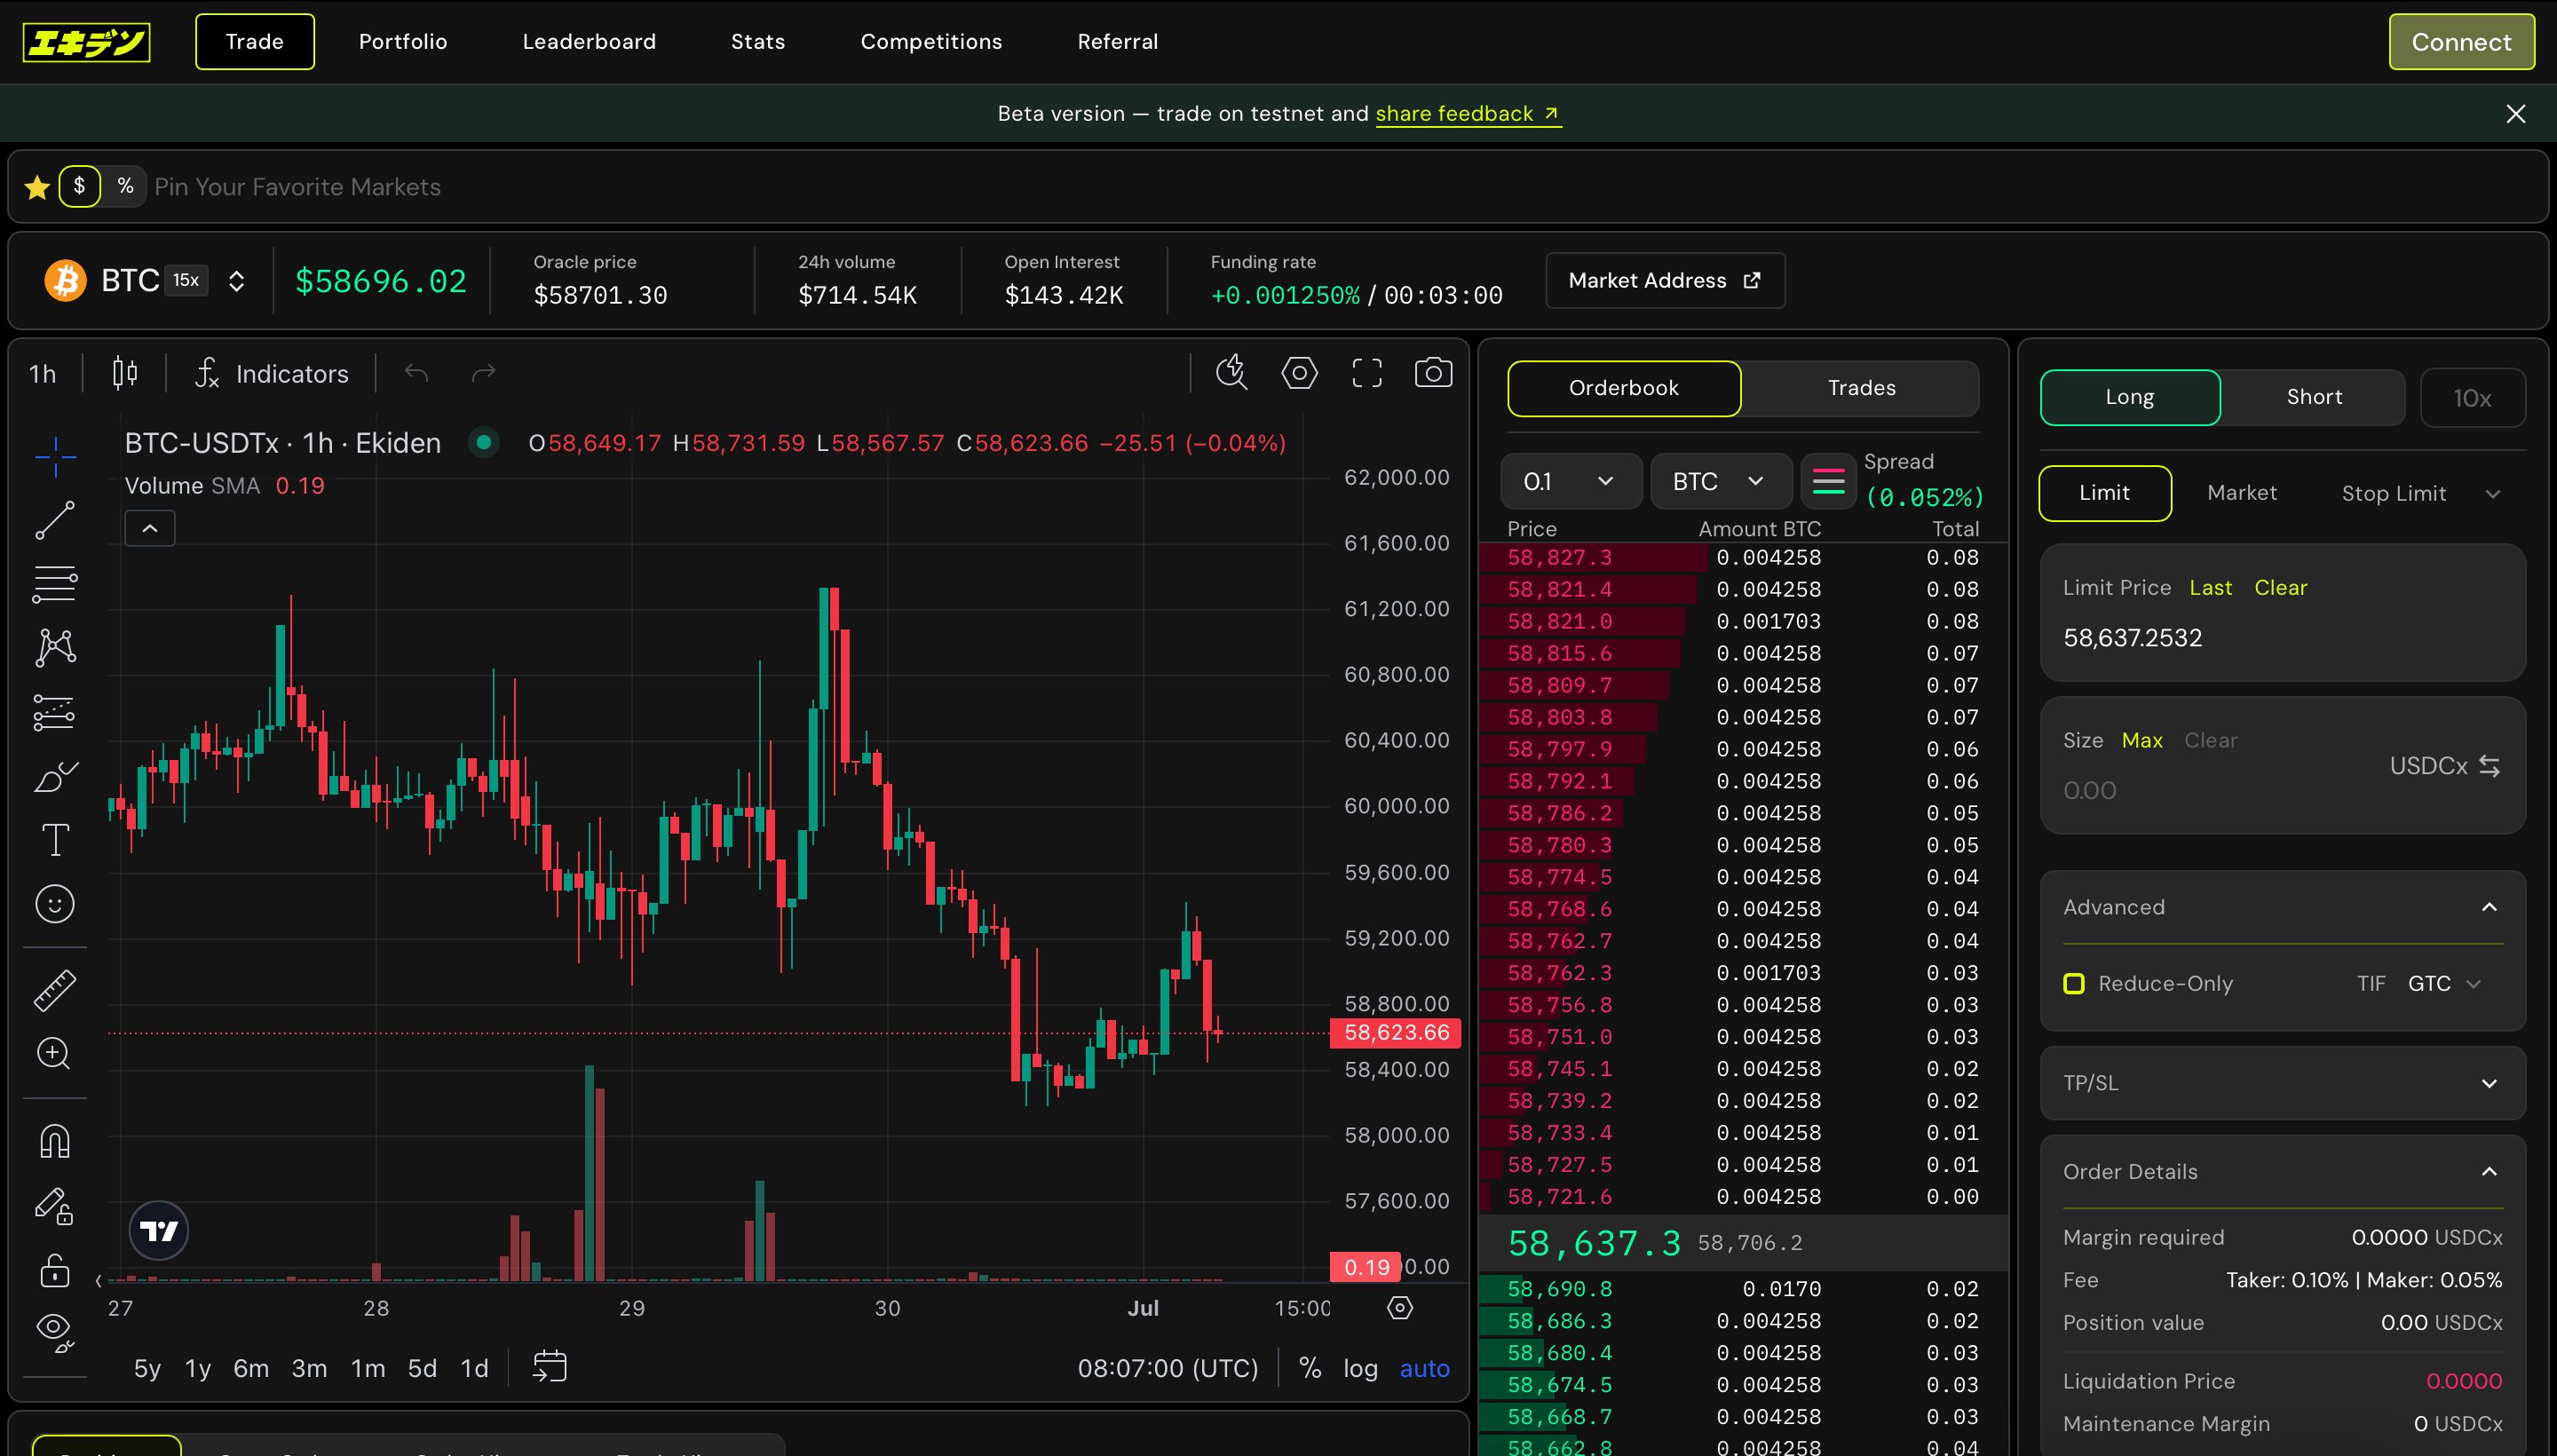
BTC-USDTx) on the Trade tab. Before connecting, the order panel and Positions table are visible but inactive — you’ll see a Connect button in the top-right corner.Choose Google to sign up or log in
Clicking Connect opens the Connect Wallet modal: “Connect your wallet to start trading perpetual futures on Ekiden.” Currently there’s a single option — Google.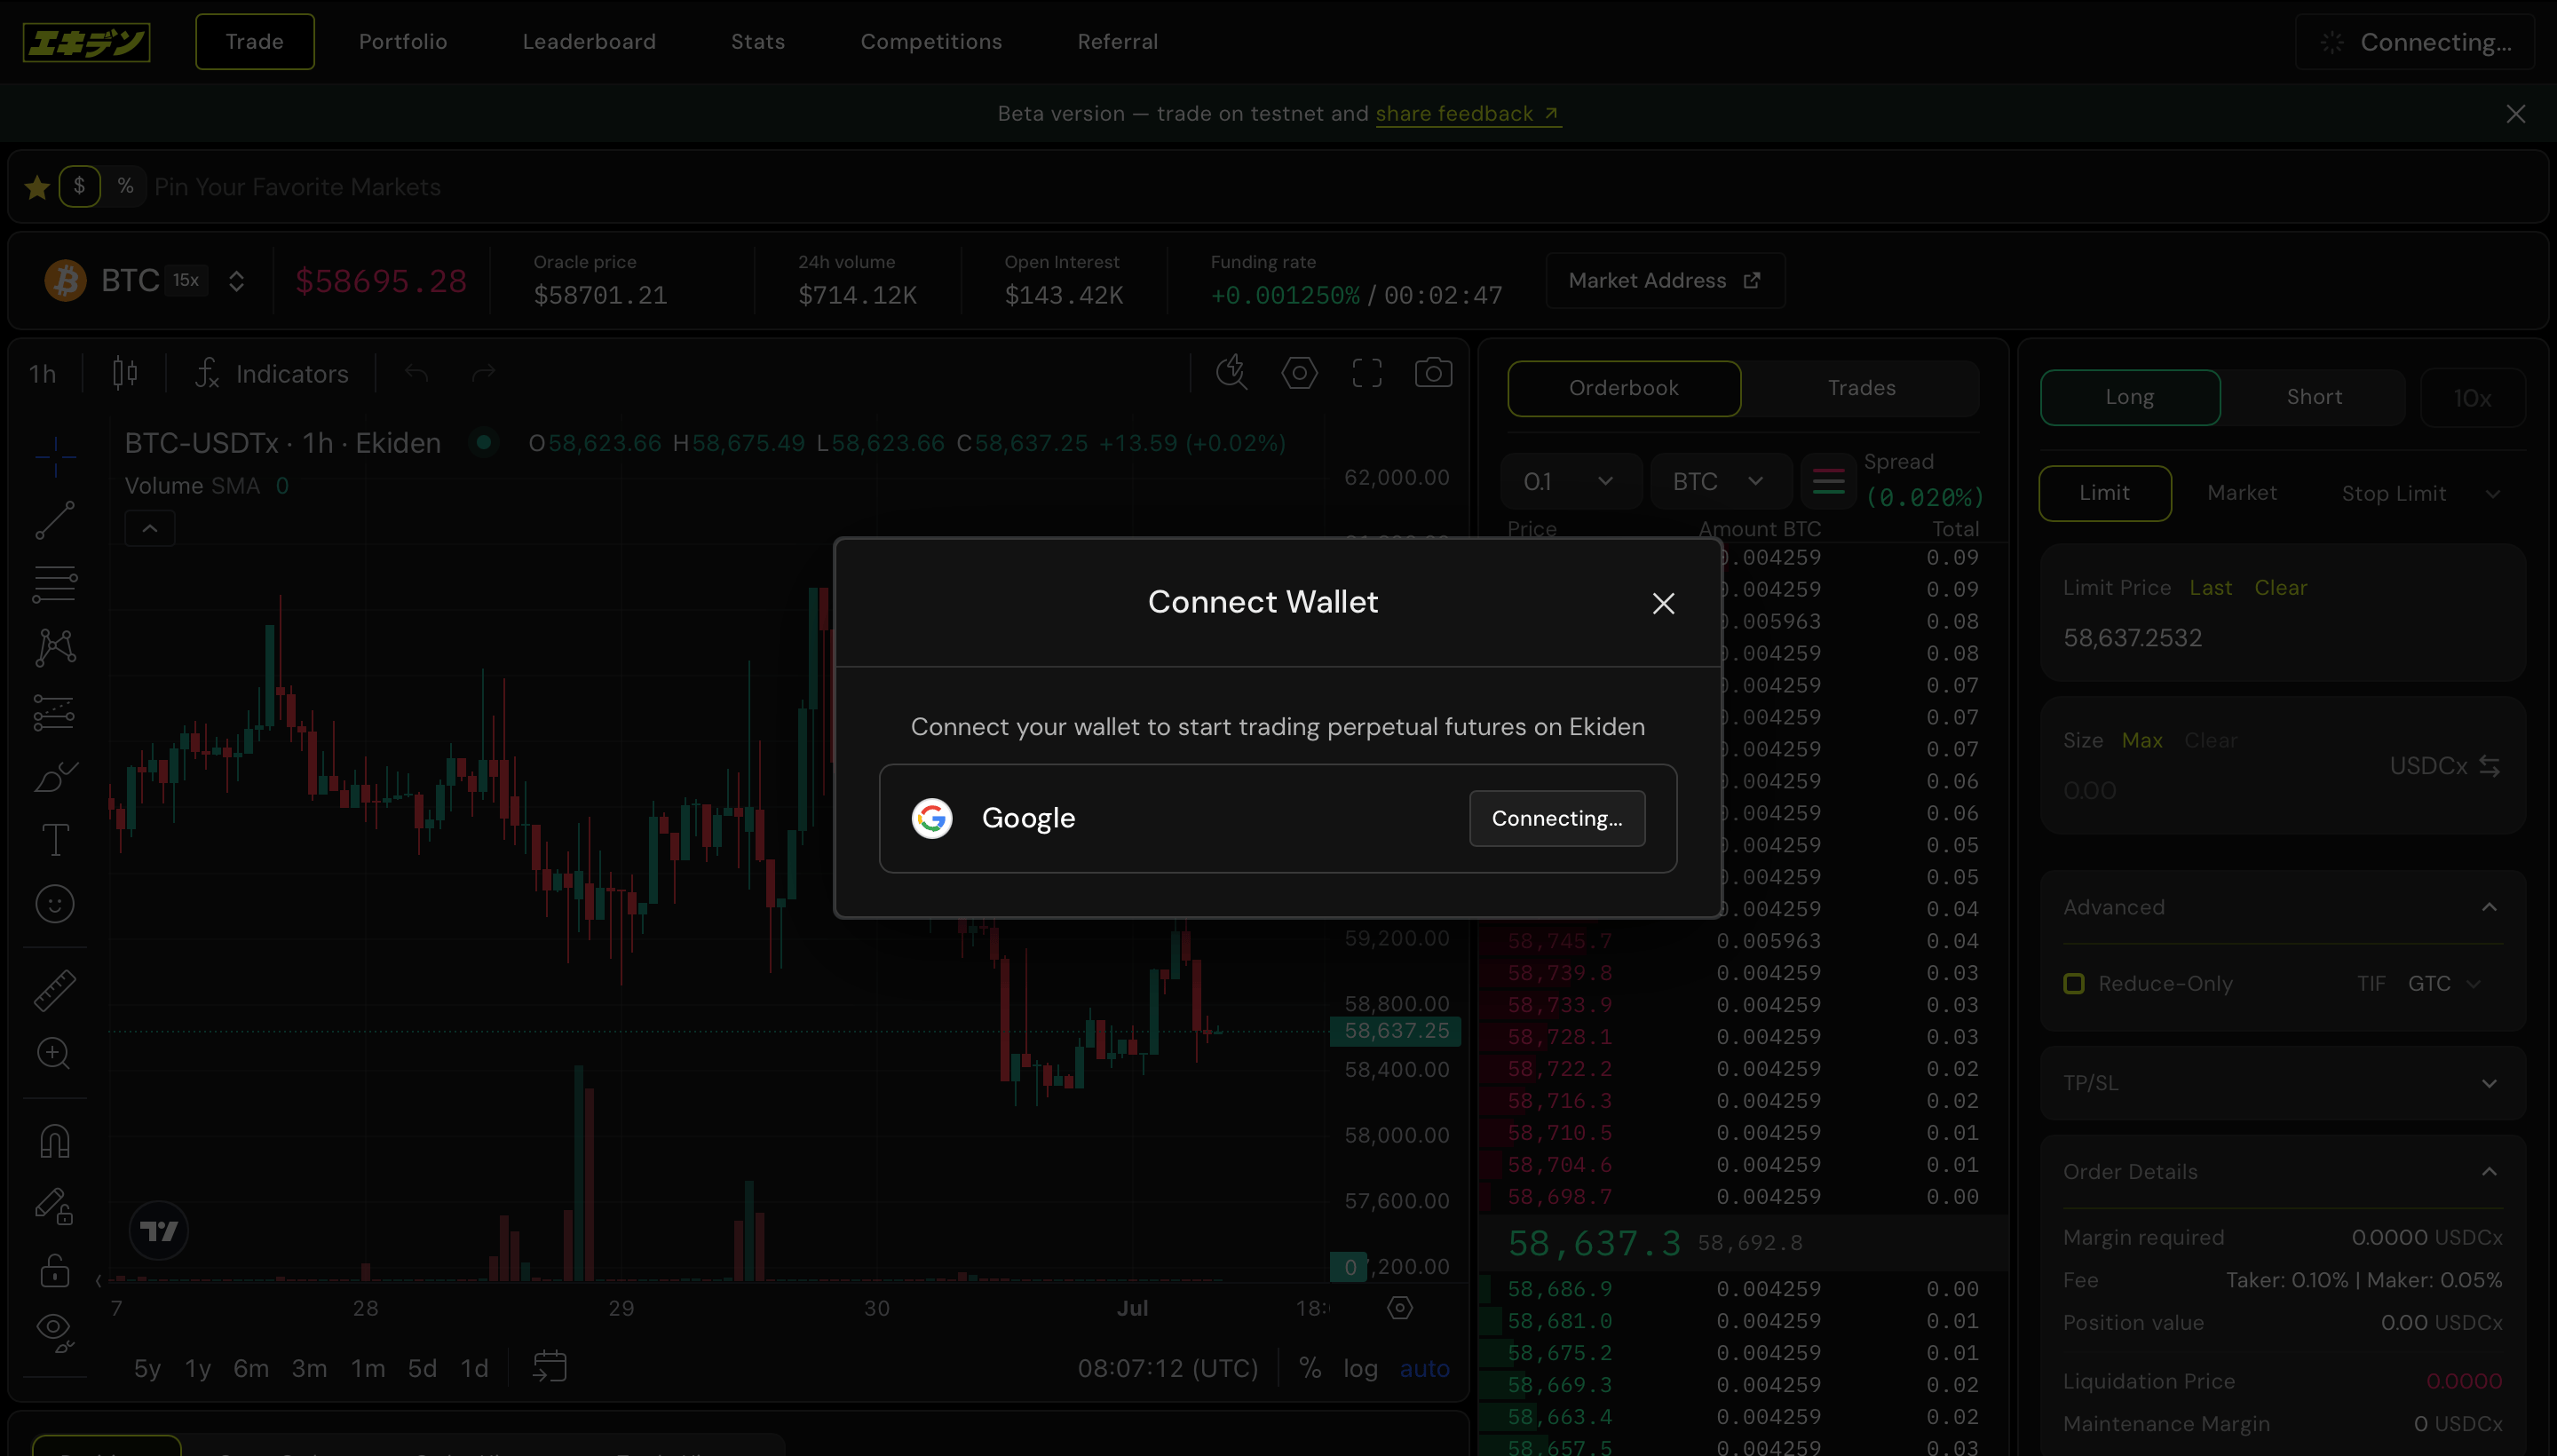
Log in or sign up on the Ekiden identity screen
You’re redirected to Ekiden’s hosted login screen (“Log in to Ekiden to continue to Wallet web UI”). From here you can either: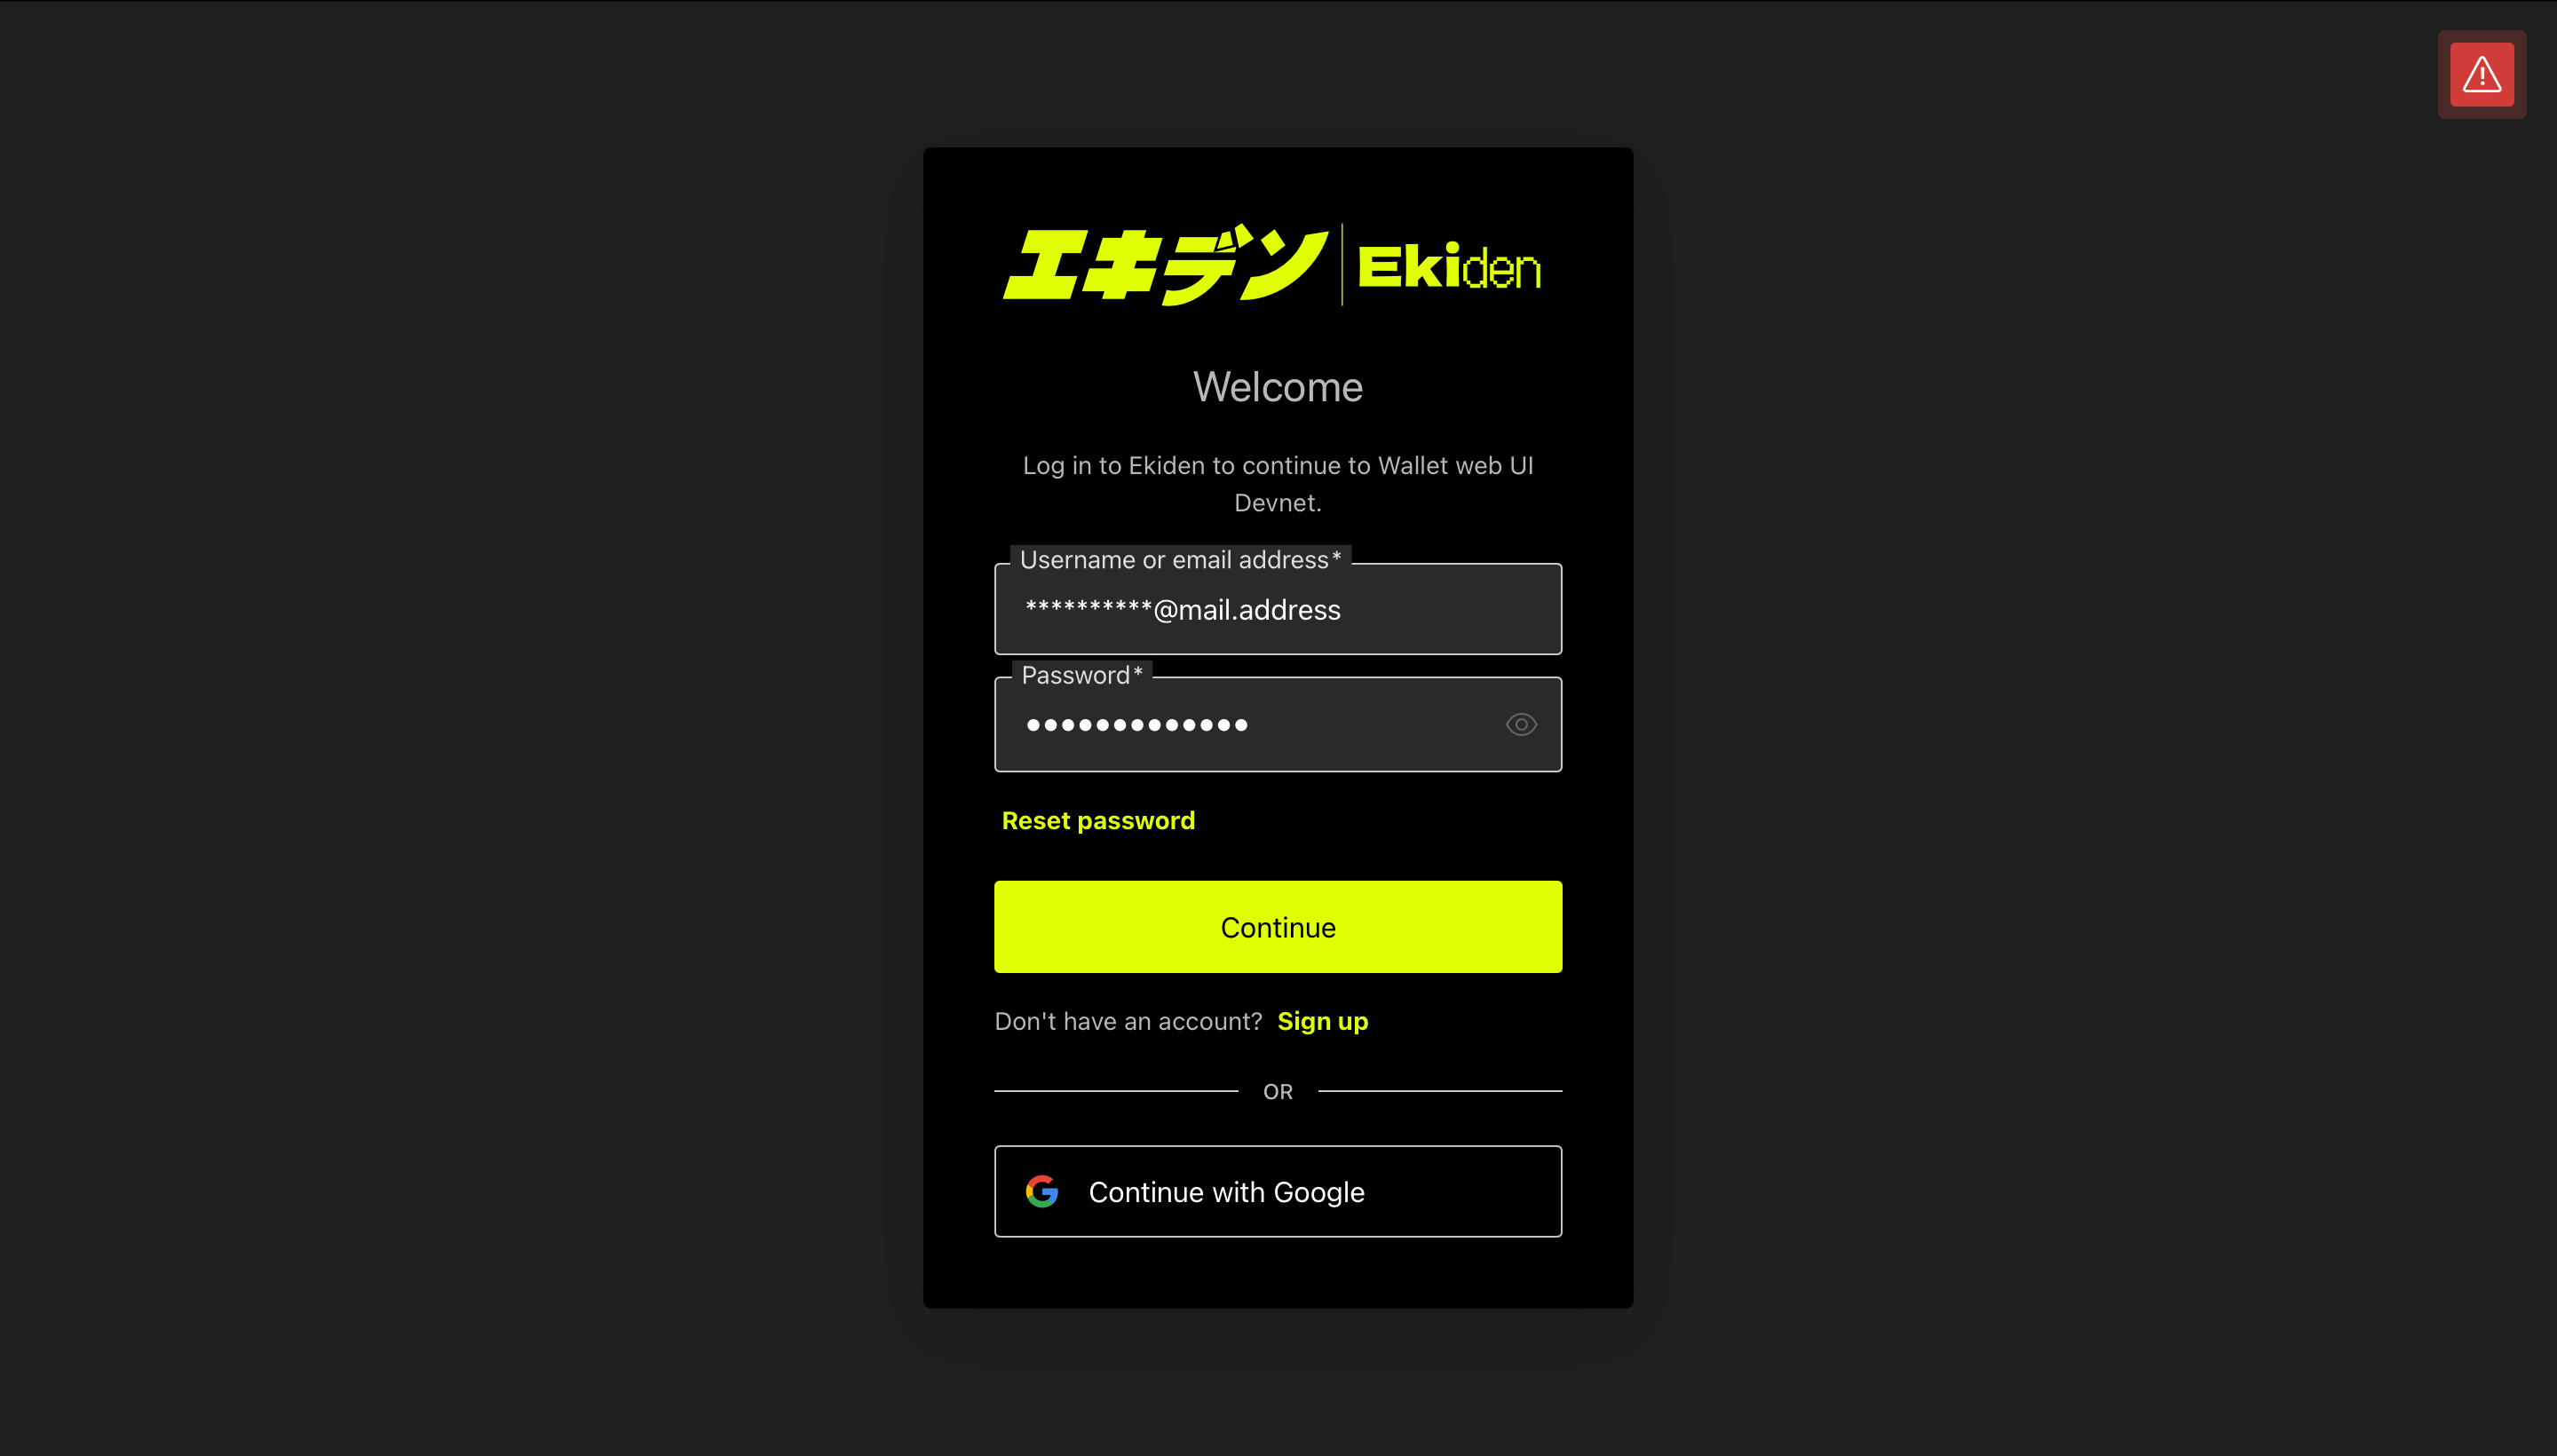
- Enter an existing username/email + password and click Continue, or
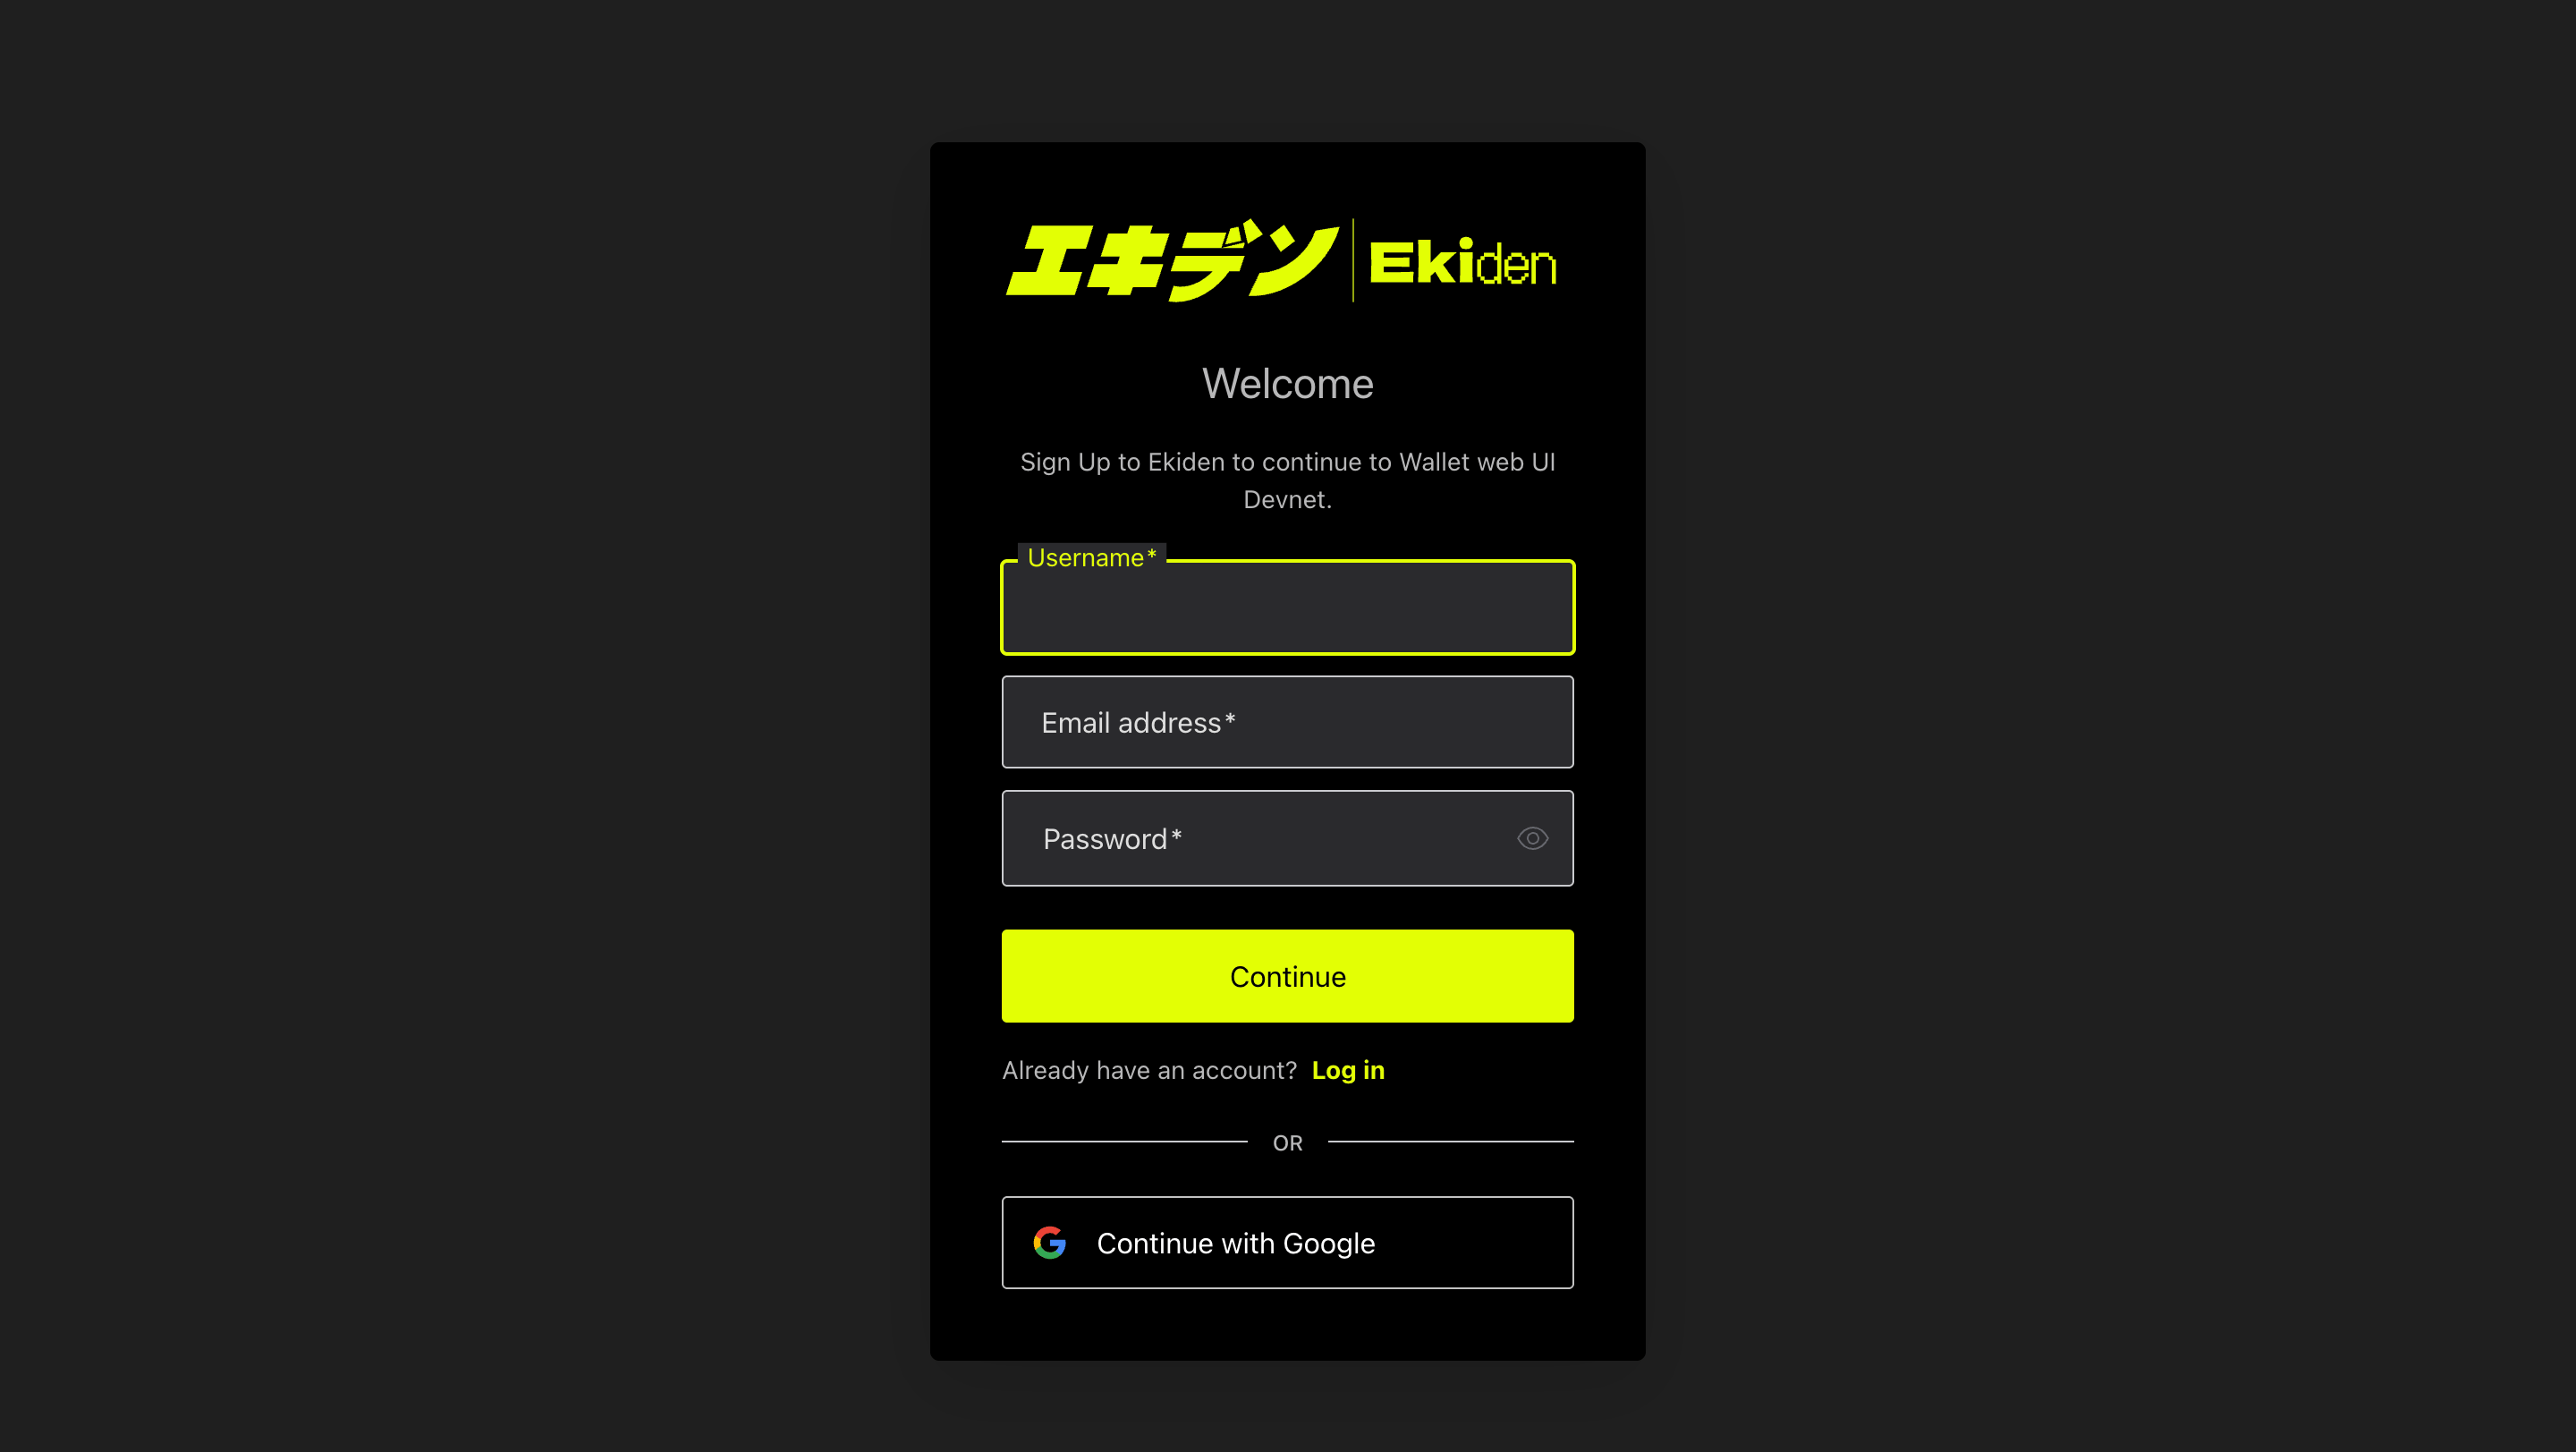
- Click Sign up if this is your first time, or
- Click Continue with Google to skip password entry entirely
Accept the Terms of Use
Back on the Ekiden app, you’ll be asked to confirm two checkboxes before signing the session: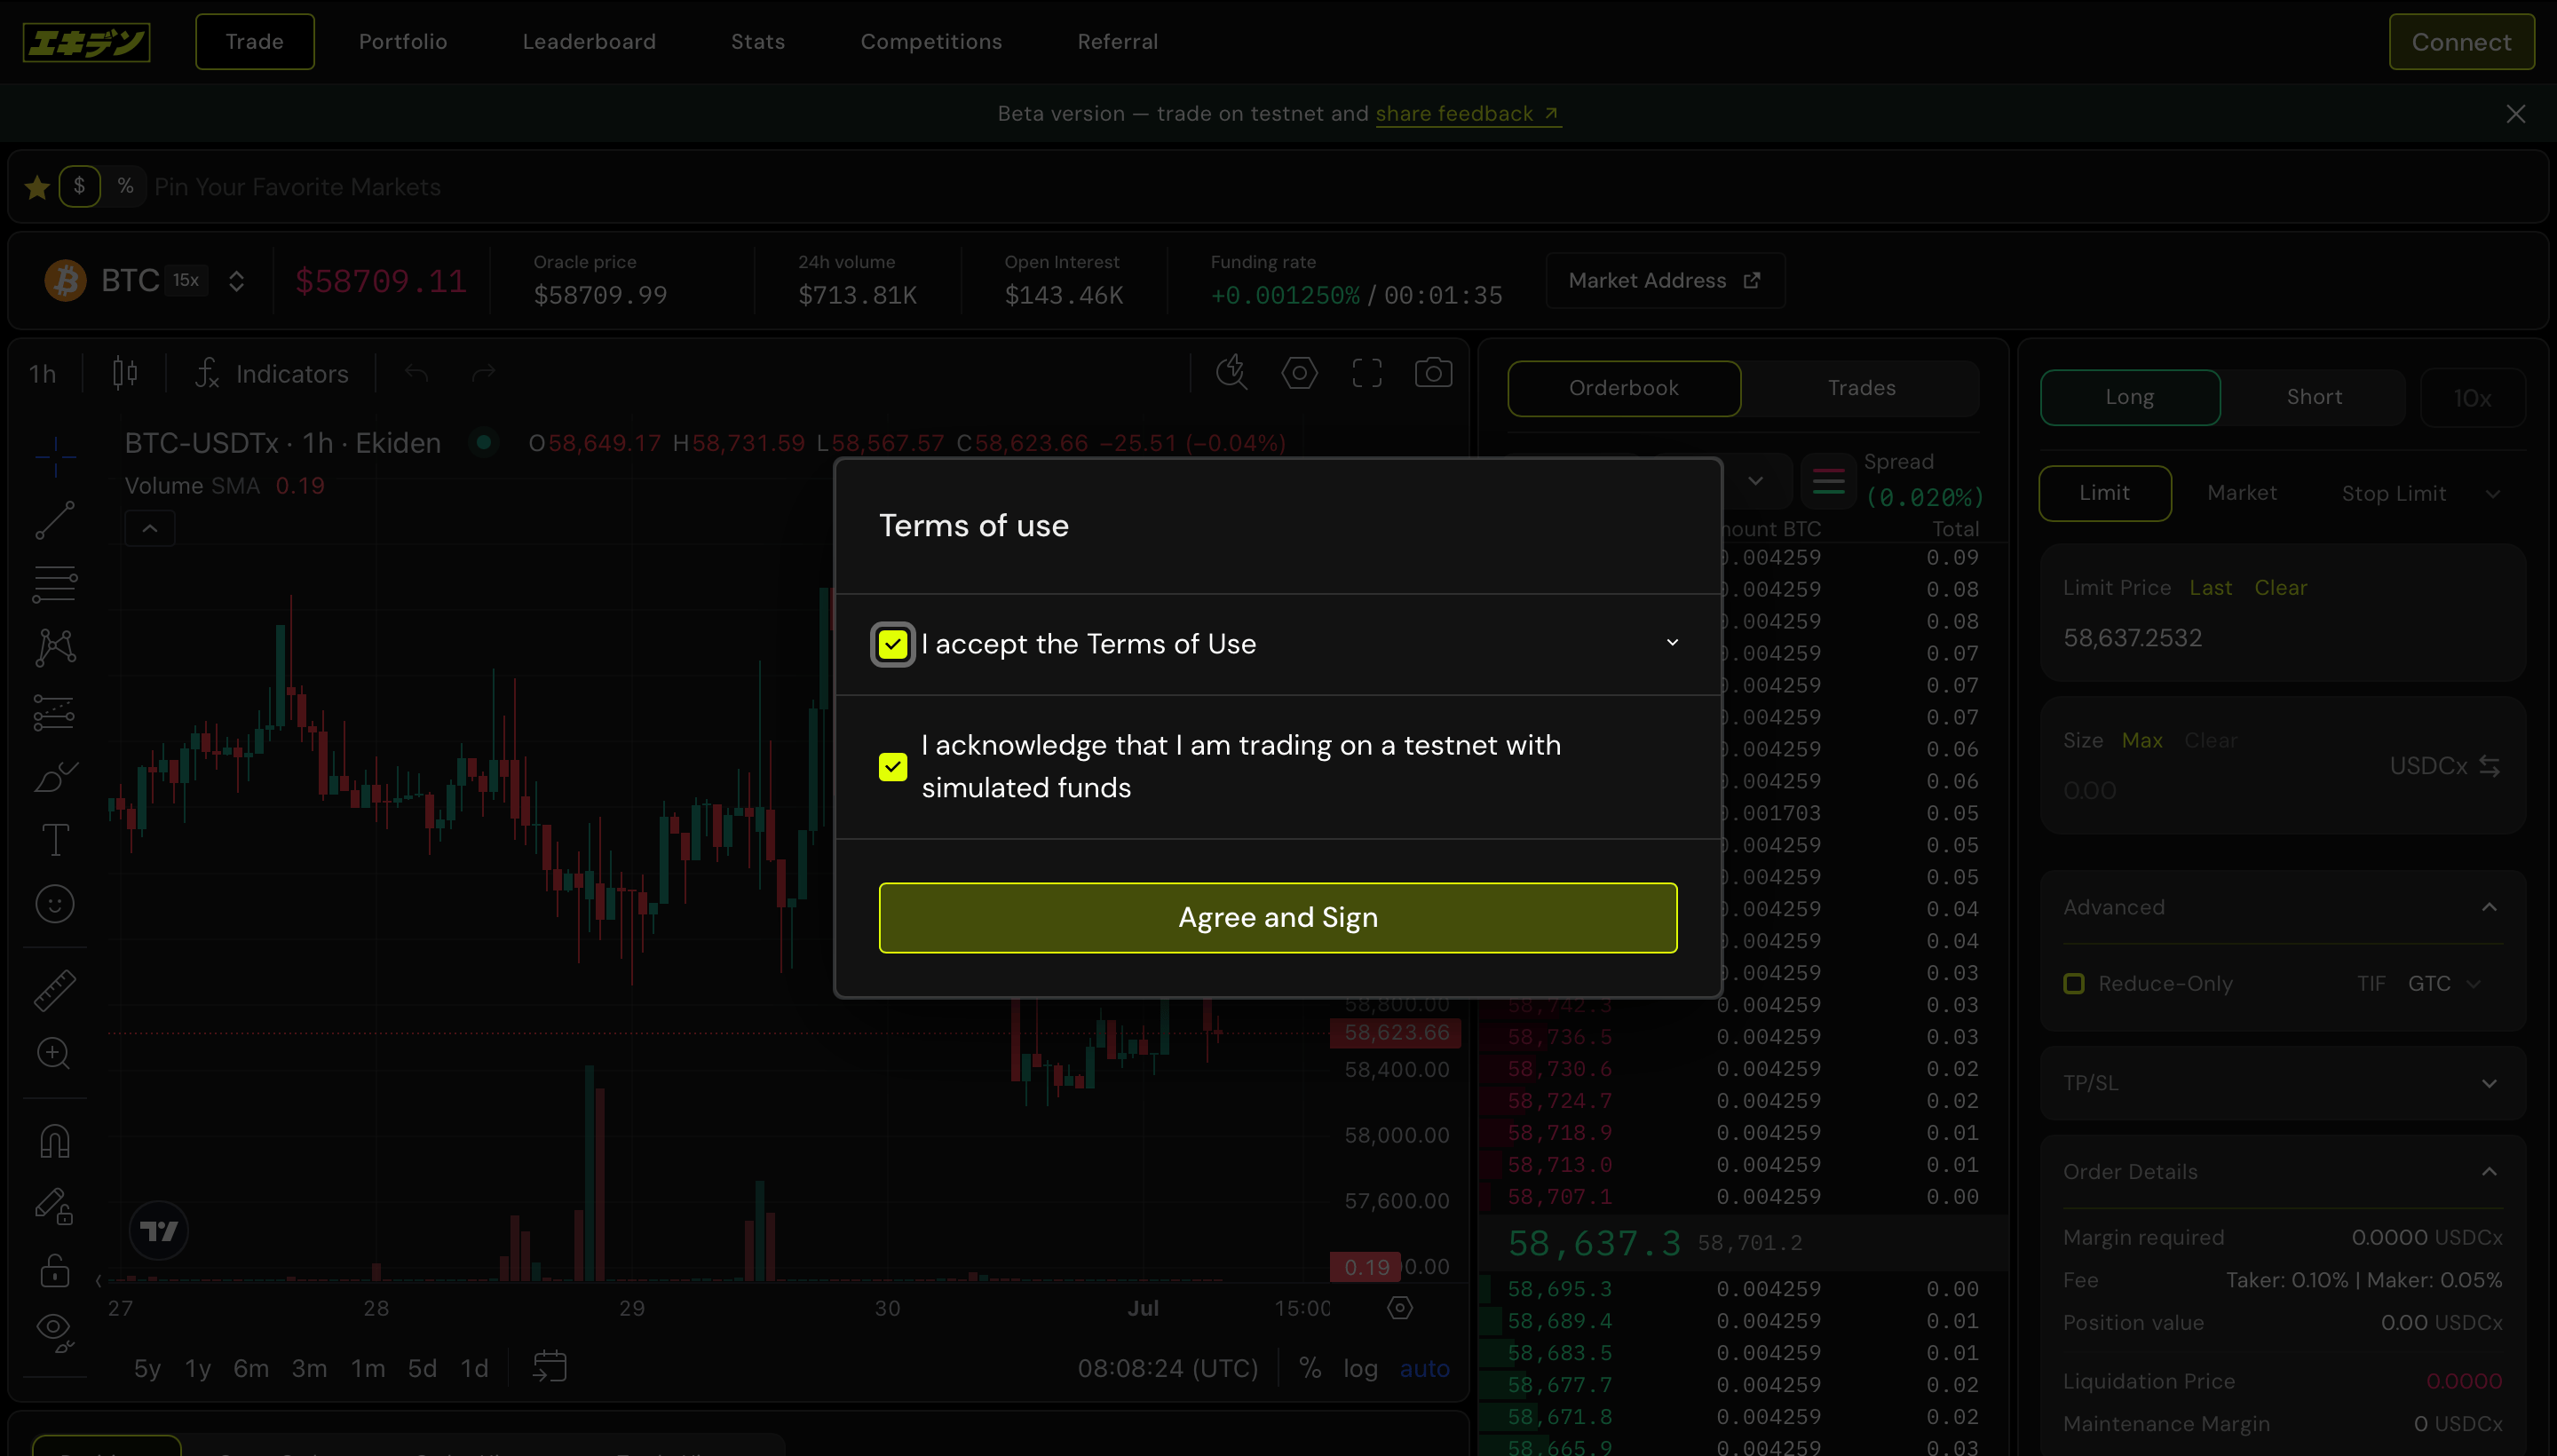
- I accept the Terms of Use
- I acknowledge that I am trading on a testnet with simulated funds
Complete the onboarding checklist
Once you’re signed in, the Welcome to Ekiden! onboarding modal walks you through six sequential steps to get your wallet fully set up for trading: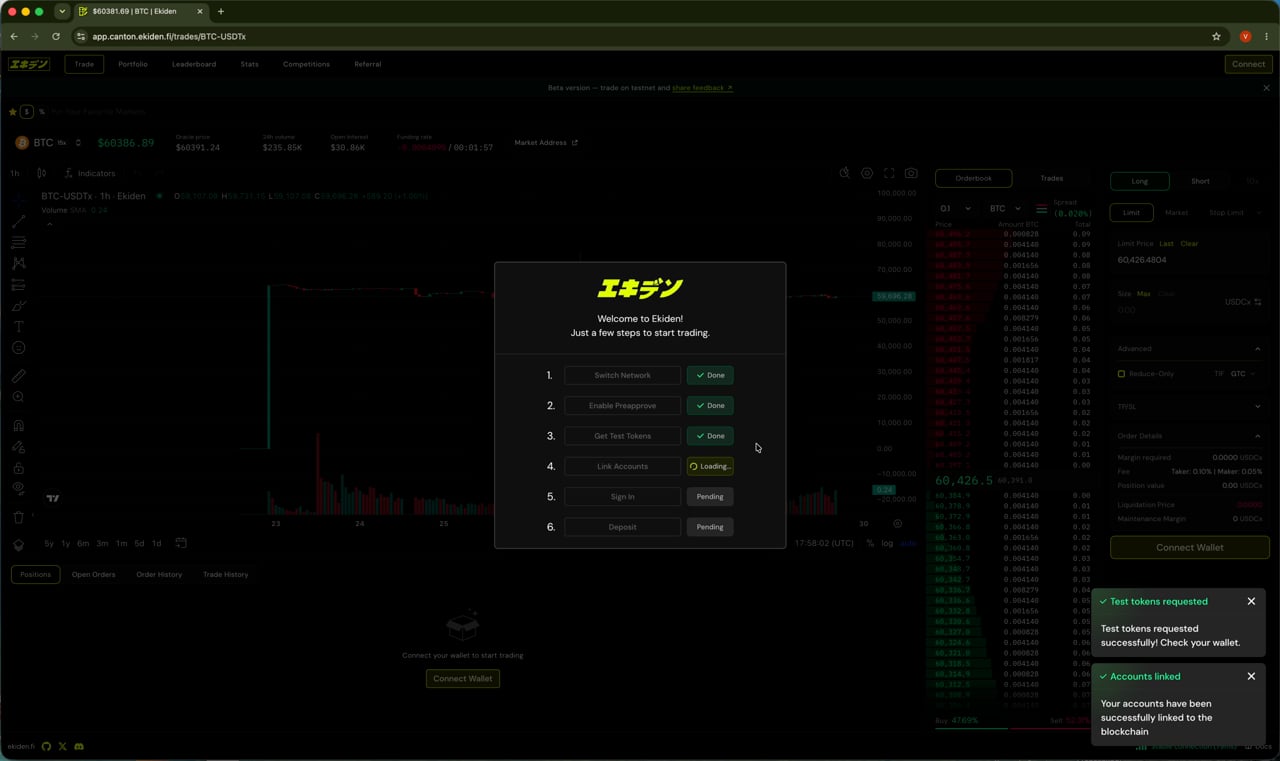
- Switch Network – points your wallet at Canton’s TestNet instead of MainNet. Every Canton wallet can target multiple networks (DevNet/TestNet/MainNet); this step makes sure you and Ekiden are looking at the same one.
- Enable Preapprove – registers your Party ID to receive USDCx without manually accepting a transfer offer for every deposit (see “What does Enable Preapprove actually do” above).
- Get Test Tokens – claims free testnet USDCx from a faucet into your Funding Account. This only works on testnet — there’s no equivalent free-money button on mainnet.
- Link Accounts – links your
Ekiden::...Party ID to your Ekiden user profile, so the app knows which on-chain identity to associate with your trading history, points, and referrals. - Sign In – you sign a message to authenticate the session. This proves control of the Party ID without exposing any private key material.
- Deposit – moves USDCx from your wallet (Funding Account) into Ekiden’s trading vault, where it becomes usable margin (your Trading Account balance).
Deposit funds into your Trading Account
Open Deposit/Withdraw → Deposit, choose the destination (Trading Account 1), enter an amount of USDCx, and confirm. Your wallet balance moves into the vault and becomes available as trading margin.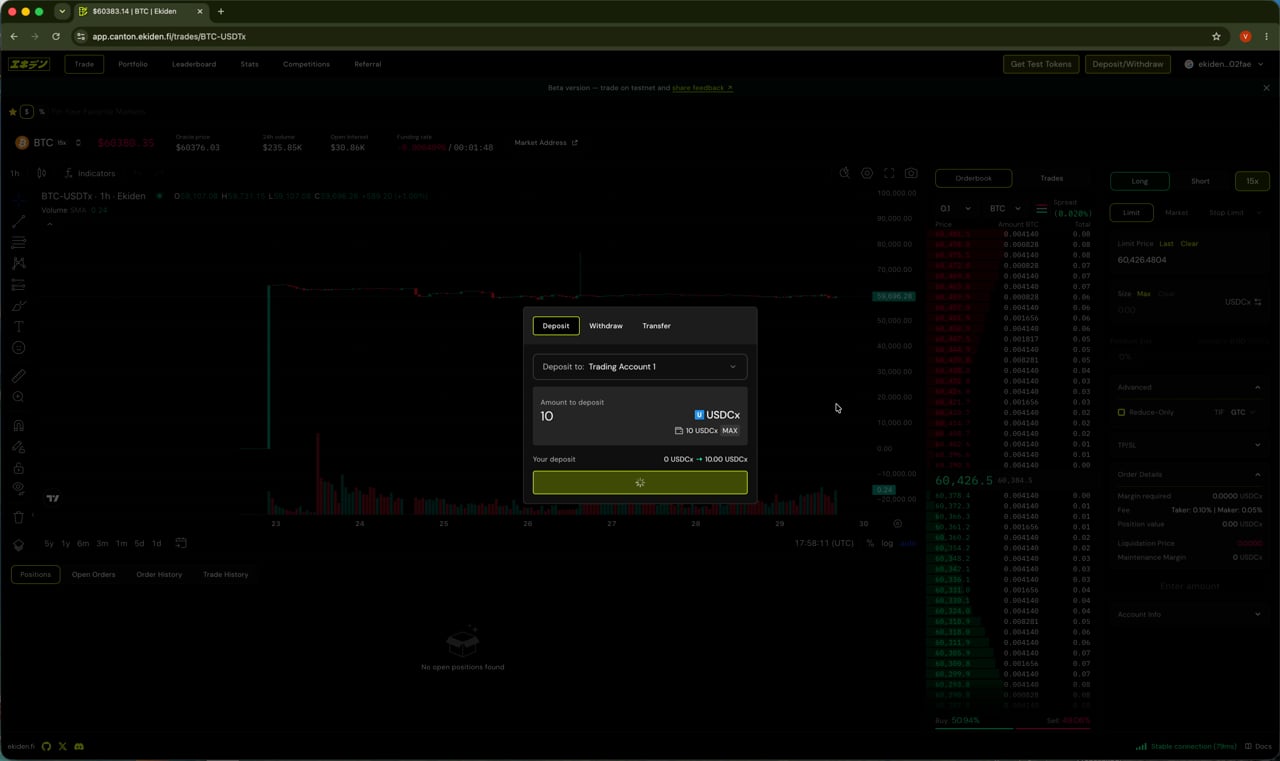
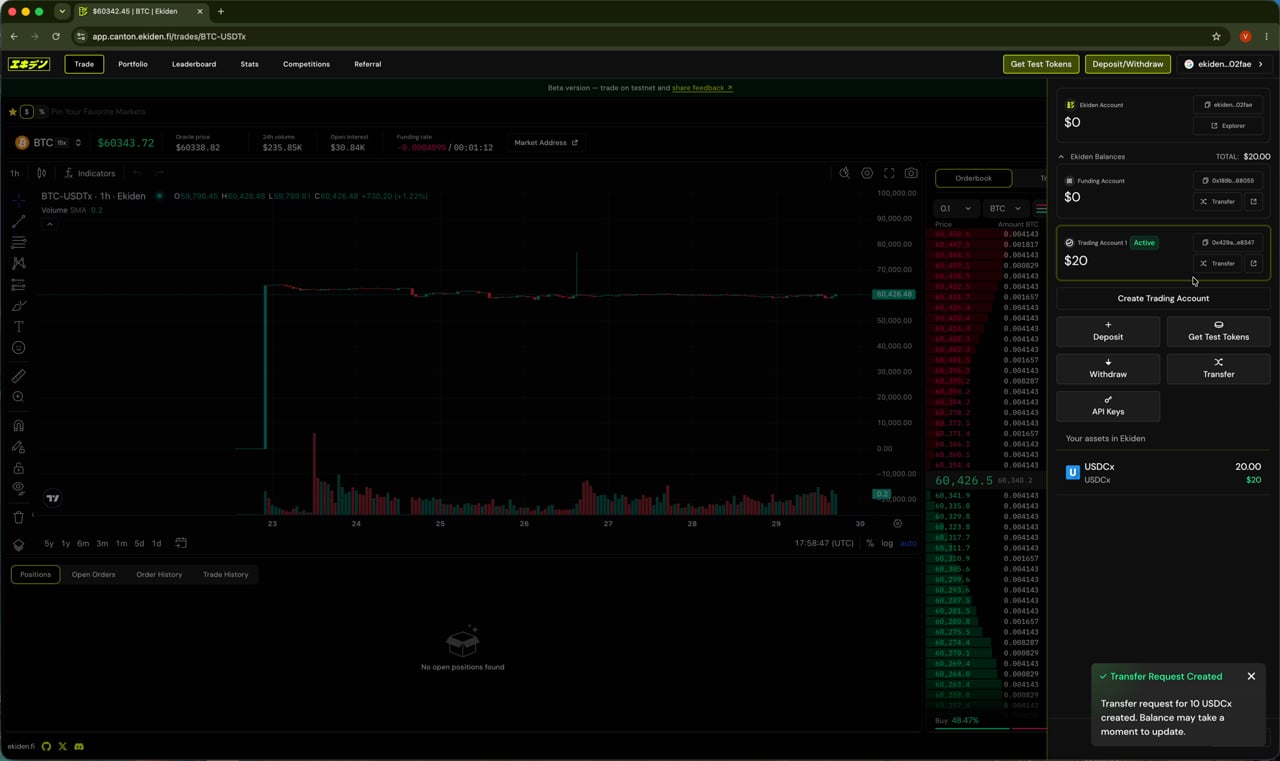
Confirm your balance
Once the deposit confirms, open the account panel (top-right) to verify: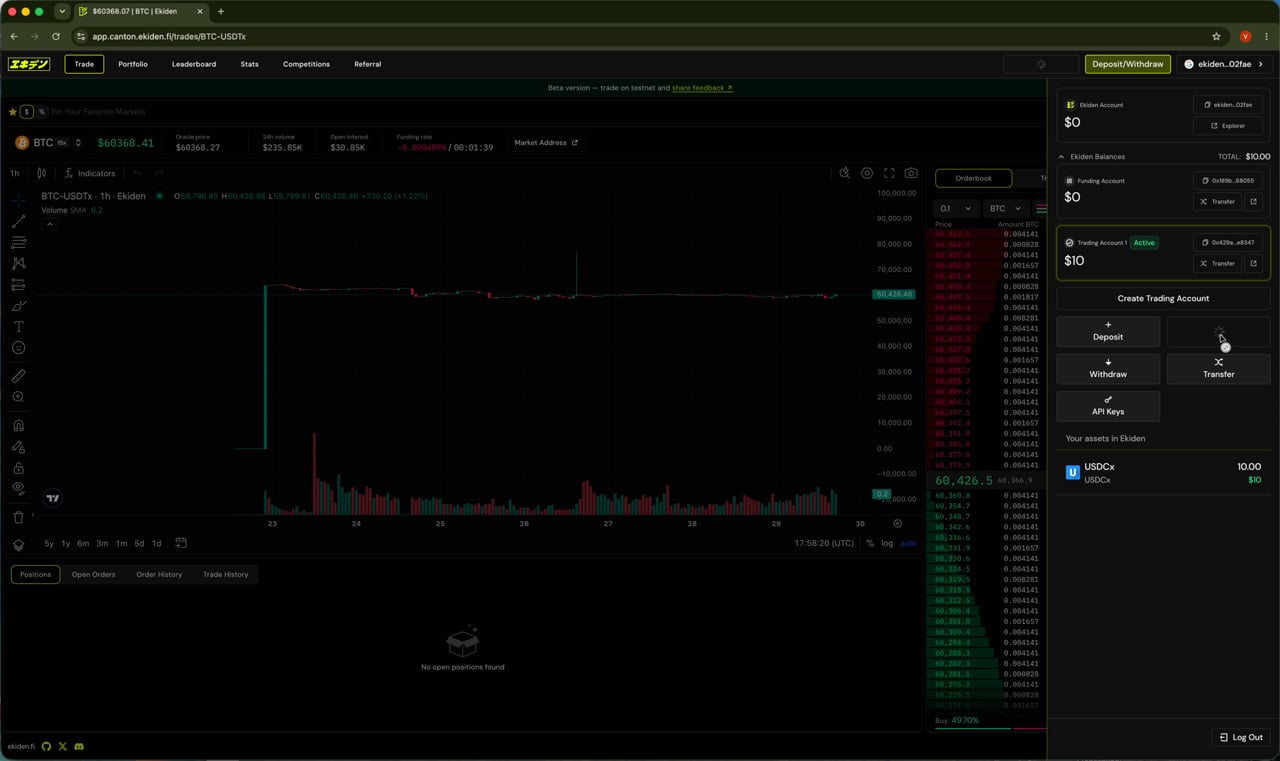
- Ekiden Balances total
- Trading Account 1 status (
Active) and balance - Your assets list (e.g.
USDCx)
What’s next
Once your Trading Account is funded, you’re ready to place orders.Trading Guide
Learn how to open positions, set leverage, manage TP/SL, and use the Portfolio, Stats, and Referral pages.